Build Laravel 11 email authentication with Mailgun and Digital Ocean
Integrate Laravel version 11.x with Mailgun to add the capacity to verify user’s emails. Read on for our step-by-step guide.
When it was first released, Laravel version 5.7 added a new capability to verify user’s emails. If you’ve ever run php artisan make:auth within a Laravel app you’ll know the feeling of pleasure and excitement when you see all of your register and login pages, complete with password hashing and a users table already built out.
This excitement will soon subside after deploying to production only to find that anyone can register with garbage@notrealemail.com or whatever they feel like typing in. This thin session authentication layer doesn’t help much in a live application. The introduction of Laravel 5.7’s MustVerifyEmailinterface added to the authentication scaffold so that in order for users to log in, they must use a real, valid email address.
There haven’t been significant changes to the Email Authentication feature within Laravel – now on version 11 – but we recommend updating to the latest version if you haven’t already.
Laravel 11, released on March 12th, 2024, continues to offer powerful email verification capabilities while introducing a streamlined application structure and other improvements. This tutorial will guide you through setting up email authentication in Laravel 11 using Mailgun and deploying it on Digital Ocean.
The first step is to create a new application with some setup:
$ laravel new email-verification-example rnrn$ cd email-verification-example rnrn$ touch database/database.sqlite
This will create the default Laravel 11.x app with the authentication scaffold and a file for an SQLite database. Update your .env file to point to the full path of the SQLite file:
DB_CONNECTION=sqlite rnDB_DATABASE=/full/path/to/email-verification-example/database/database.sqlite
Let’s inspect the default auth scaffold and see what changes need to be made to add email verification.
You can view the Laravel email validation docs here.
In Laravel 11, the process of adding email verification remains similar, but the file structure has changed. Open your bootstrap/app.php file and ensure it includes the following:
Next implement the MustVerifyEmail interface. An interface in PHP specifies the methods a class must implement. You will need to verify your AppModeIsUser implements the IlluminateContractsAuthMustVerifyEmail contract:
That interface enforces that we have three new methods on our User model:
hasVerifiedEmail() markEmailAsVerified() sendEmailVerificationNotification() The implementation for these methods can be found in: vendor/laravel/framework/src/Illuminate/Auth/MustVerifyEmail.php. To mark a user as verified, we need to have an email_verified_at column on our users table, which is already provided in our default create users table migration:
Schema::create('users', function (Blueprint $table) { rn $table-u003eincrements('id'); rn $table-u003estring('name'); rn $table-u003estring('email')-u003eunique(); rn $table-u003etimestamp('email_verified_at')-u003enullable(); rn $table-u003estring('password'); rn $table-u003erememberToken(); rn $table-u003etimestamps(); rn});
Run the migrations to create the table: php artisan migrate.
In the routes/web.php file update the authentication routes to include email verification:
Auth::routes(['verify' =u003e true]);
In Laravel 11, routes are defined in the bootstrap/app.php file. Ensure your web routes are included and add the verification routes:
-u003ewithRouting( rnrn web: __DIR__.'/../routes/web.php', rnrn commands: __DIR__.'/../routes/console.php', rnrn health: '/up', rnrn)
Then, in your routes/web.php file, add:
To view all the routes available to your application you can run php artisan route:list. That’s pretty much all we need to do from the Laravel side to verify emails. If you try it now though, it won’t work.
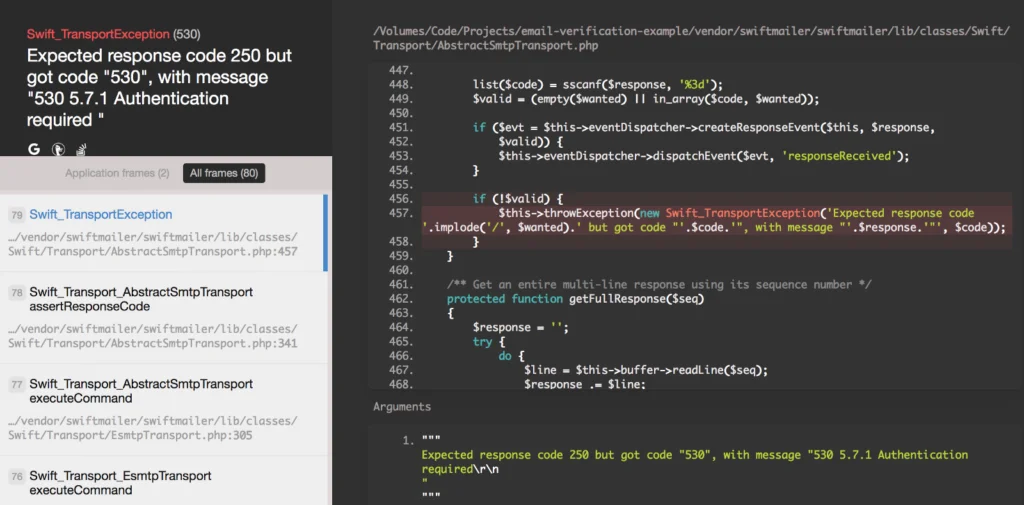
Before we can send emails from our PHP server we need to configure a mail driver within Laravel. You can check though using tinker to see that a user was created with an email_verified_at of null.
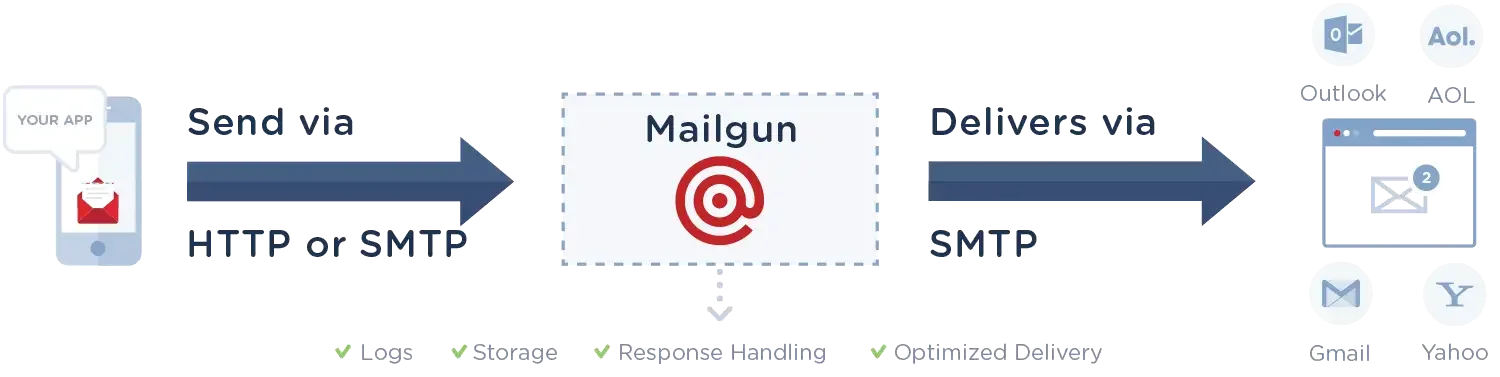
Mailgun offers the ability to send emails via SMTP server or over their API. In this tutorial, we’re going to send emails via the Mailgun API. It’s faster, scales better, and takes less work to set up than configuring SMTP.
We’re going to be sending API calls. For that we need Guzzle:
$ composer require guzzlehttp/guzzle
In order for our application to send emails: we need a hosted domain name. I have a domain name that I bought through Google Domains for about $12/year. The site (https://employbl.com/) is hosted on Laravel Forge for a monthly fee. To get it deployed I followed the Laracasts course, Learn Laravel Forge.
In that course, I set up my Laravel application to run off Digital Ocean droplets. In that process I configured my Google Domain name to point to Digital Ocean.
Once you’ve created a Mailgun account, you’ll need to verify your domain, which takes about 24 hours. To do that, we need to add TXT, CNAME and MX records. If the MX records are already pointed to a mailbox provider, you can configure a subdomain instead. To find these records go to the domain in your Mailgun account and check Domain Verification & DNS. Once you have a working Mailgun domain, head to the dashboard to find your API key and update the .env file accordingly.
MAIL_DRIVER=mailgun MAILGUN_DOMAIN=mg.YOUR_DOMAIN.com MAILGUN_SECRET=YOUR_KEY_HERE
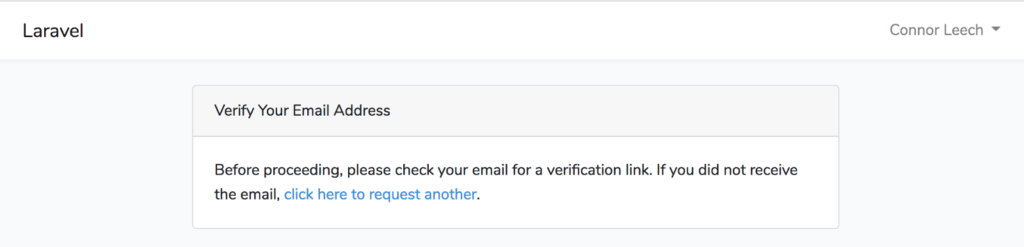
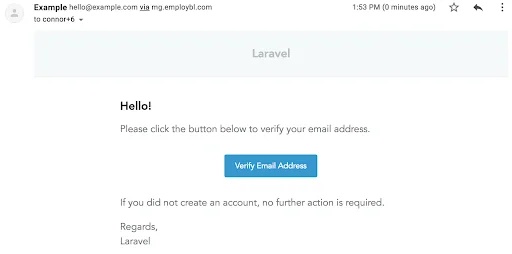
Once email sending is configured, after a user registers they will see a landing page asking them to check their email. This page can be modified in resources/views/auth/verify.blade.php.
That will send a real email to the address you provided. The template for this email exists in IlluminateAuthNotificationsVerifyEmail.php.
If we don’t want our verification emails to say “Regards” or the above text then we need to customize them. You can publish the default templates using the below publish commands:
$ php artisan vendor:publish u002du002dtag=laravel-notificationsrn$ php artisan vendor:publish u002du002dtag=laravel-mail
Then write the new defaults in resources/views/vendor/notifications/email.blade.php. If you have more to change you could re-implement the notification by adding a new sendEmailVerificationNotification method to your User model that returns a custom notification that you make.
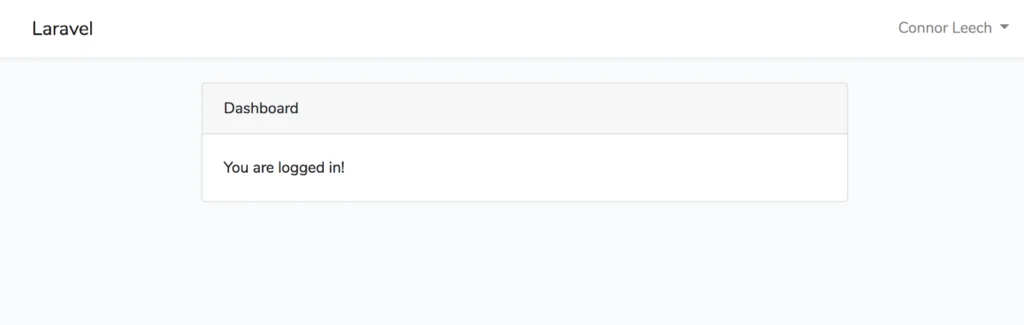
Once the user clicks the Verify Email Address link they’ll be redirected to their dashboard able to login without issue.
That should have you going! The most difficult part for me was getting the mail server and Mailgun configured. After your domain is verified and Mailgun is all set up the Laravel part ends up being straightforward.
Have you been able to get up and running? Is anyone using this functionality in production yet? Hit me up on Twitter or leave comments below.
I found these tutorials, in addition to the links above to be very helpful.
Connor Leech, our guest author, is a Software Engineer over at Stitch Labs. You can contact him through his email. For more problem solving posts and guides, subscribe to our newsletter so you don’t miss out on any insights from our expert guests and resident email geeks.