Dev Life
Sending email using C# and the Mailgun API
.NET is one of the most popular, stable, and admired web frameworks you can use to build modern web applications. The tooling provided by .NET can help you get started quickly and maintain your applications well into the future. With it, you can build everything from small laser-focused microservices to full-fledged web applications.
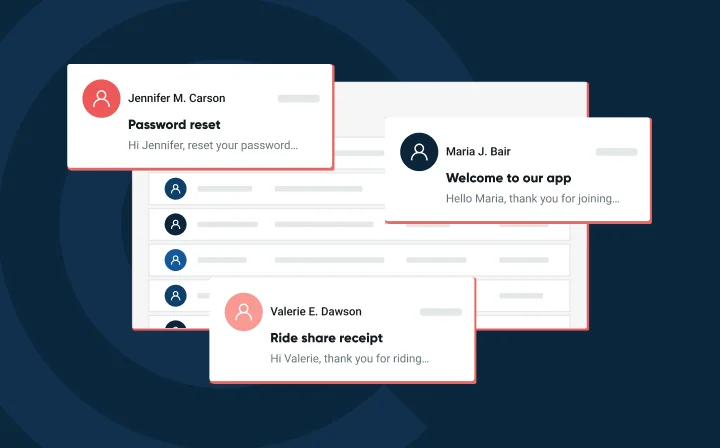
Eventually, though, every real-life application needs to be able to send transactional emails (such as account verification, password resets, automated daily/monthly summary reports, and so on). While .NET offers tooling that helps you send emails, it doesn’t have the production-capable infrastructure you need to reliably and efficiently send them.
In this article, you’ll learn how to use Mailgun’s HTTP API to send transactional emails from your .NET applications and ensure that your integration is reliable, scalable, and secure.
How to send email using the Mailgun API
Before you begin this tutorial, you’ll need the following prerequisites:
- Basic knowledge of C# and .NET
- Any modern IDE like Visual Studio, JetBrains Rider, or Visual Studio Code
If you choose not to use Visual Studio and running dotnet –info from a terminal isn’t successful, then you’ll need to download and install the latest .NET SDK.
Set up your Mailgun account
Start by creating a free Mailgun account. Once you’re logged in, create a new API key and store it for later use.
For production email sending, you need to register a domain that you own with Mailgun. In this tutorial, you’ll use the sandbox domain provided by Mailgun.
Create a new C# project
Once your Mailgun account is set up, you need to create a new .NET MVC web solution and configure some additional tools to help you send transactional emails with .NET.
Open a terminal and run dotnet new mvc -n MailDemo. This command creates a new .NET web project using an MVC architecture inside a new /MailDemo folder. Next, execute cd MailDemo to navigate into the new folder created for you.
After you’ve navigated into the folder, you need to add your configuration values to appsettings.json. Add a new JSON entry named “Mailgun”. The value for Mailgun:ApiKey is the API key that you created in the previous section (you’ll learn about securing your API keys later). Mailgun:Domain is the sandbox domain that has already been created for you.
Your entire appsettings.json file should look like this:
{rn "Logging": {rn "LogLevel": {rn "Default": "Information",rn "Microsoft.AspNetCore": "Warning"rn }rn },rn "AllowedHosts": "*",rn "Mailgun": {rn "ApiKey": "<Your API Key>",rn "Domain": "<Your sandbox domain>"rn }rn}
Next, you need to configure a named HttpClient for easy reuse of default parameters. To do so, open Program.cs. The top of the file should look like this:
using System.Net.Http.Headers;rnusing System.Text;rnrnvar builder = WebApplication.CreateBuilder(args);rnrn// Add services to the containerrnbuilder.Services.AddControllersWithViews();rnrn// Set up your named HttpClient for easy reusernbuilder.Services.AddHttpClient("Mailgun", client =>rn{rn // Grab values from the configurationrn var apiKey = builder.Configuration.GetValue<string>("Mailgun:ApiKey");rn var base64Auth = Convert.ToBase64String(Encoding.ASCII.GetBytes($"api:{apiKey}"));rn var domain = builder.Configuration.GetValue<string>("Mailgun:Domain");rnrn // Set default values on the HttpClientrn client.BaseAddress = new Uri($"https://api.mailgun.net/v3/{domain}/messages");rn client.DefaultRequestHeaders.Authorization = new AuthenticationHeaderValue("Basic", base64Auth);rn});rnrnvar app = builder.Build();rn
Since you’ll only be sending emails, your HttpClient is configured with the full URL from Mailgun’s HTTP API that’s used for sending mail.
At this point, everything you need to send your first email is ready.
More about Mailgun API endpoints
The HttpClient is configured to send HTTP requests to the https://api.mailgun.net/v3/{domain}/messages endpoint. Mailgun also offers other endpoints to help you have a robust and holistic tool for managing and sending transactional emails:
- Send email: POST /v3/{domain_name}/messages
- Send email in MIME format: POST /v3/{domain_name}/messages.mime
- Retrieve a stored email: GET /v3/domains/{domain_name}/messages/{storage_key}
- View your domains: GET /v4/domains
- Create a new domain: POST /v4/domains
- View a paginated list of all inbound and outbound events: GET /v3/{domain_name}/events
- View a paginated list of all bounces: GET /v3/{domainID}/bounces
Send your first email with the Mailgun API
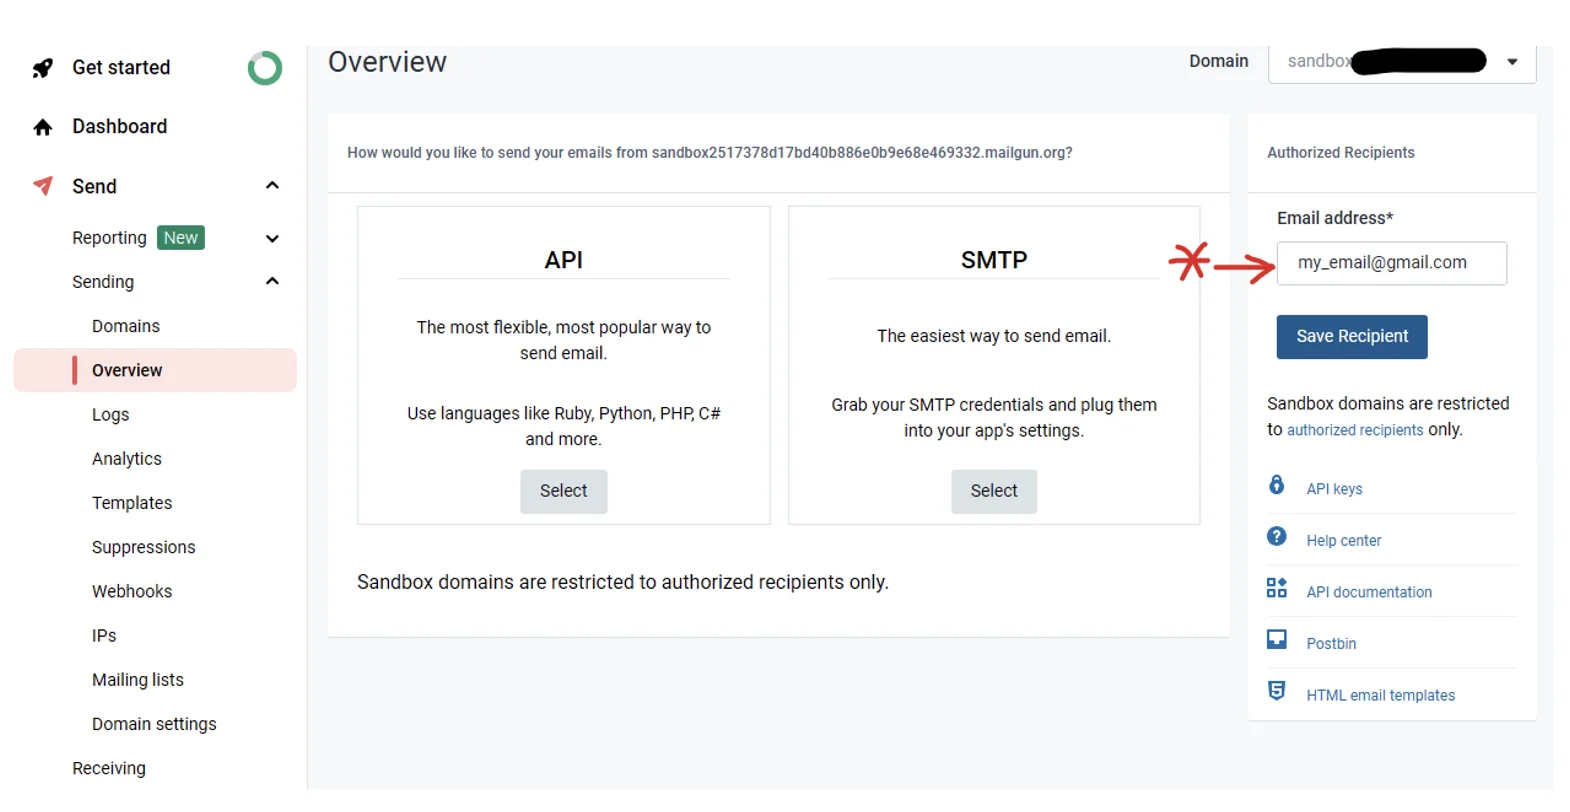
Before you send your first transactional email, make sure that the recipient email address you use is one of the authorized recipients for your sandbox domain. In your Mailgun account, view your domains, open your sandbox domain, and on the right-hand side, add your personal email as an authorized recipient:
Next, create a new file at /Controllers/OrderController.cs and replace the contents of the file with the following:
using System.Diagnostics;rnusing Microsoft.AspNetCore.Mvc;rnusing MailDemo.Models;rnusing System.Text;rnusing System.Net.Mime;rnrnnamespace MailDemo.Controllers;rnrnpublic class OrderController : Controllerrn{rn private readonly HttpClient _httpClient;rn private readonly IConfiguration _config;rnrn public OrderController(IHttpClientFactory httpClientFactory, IConfiguration config)rn {rn // Get your named HttpClient that is preconfiguredrn this._httpClient = httpClientFactory.CreateClient("Mailgun");rn this._config = config;rn }rnrn public async Task<IActionResult> Confirm()rn {rn using MultipartFormDataContent form = new();rnrn // Local function keeps this code a bit clearerrn void SetFormParam(string key, string value) =>rn form.Add(new StringContent(value, Encoding.UTF8, MediaTypeNames.Text.Plain), key);rnrn SetFormParam("from", $"Test User <postmaster@{this._config.GetValue<string>("Mailgun:Domain")}>");rn SetFormParam("to", "your_authorized_recipient.com");rn SetFormParam("subject", "Hello World!");rn SetFormParam("text", "My first transactional email!");rn SetFormParam("html", @"<html><body><p style=""color:blue;"">My first transactional email!</p></body></html>");rnrn var result = await this._httpClient.PostAsync(string.Empty, form);rnrn if (!result.IsSuccessStatusCode)rn {rn return new JsonResult(await result.Content.ReadAsStringAsync());rn }rnrn return new JsonResult(@"Your order was confirmed. You should get an email soon!");rn }rn}rn
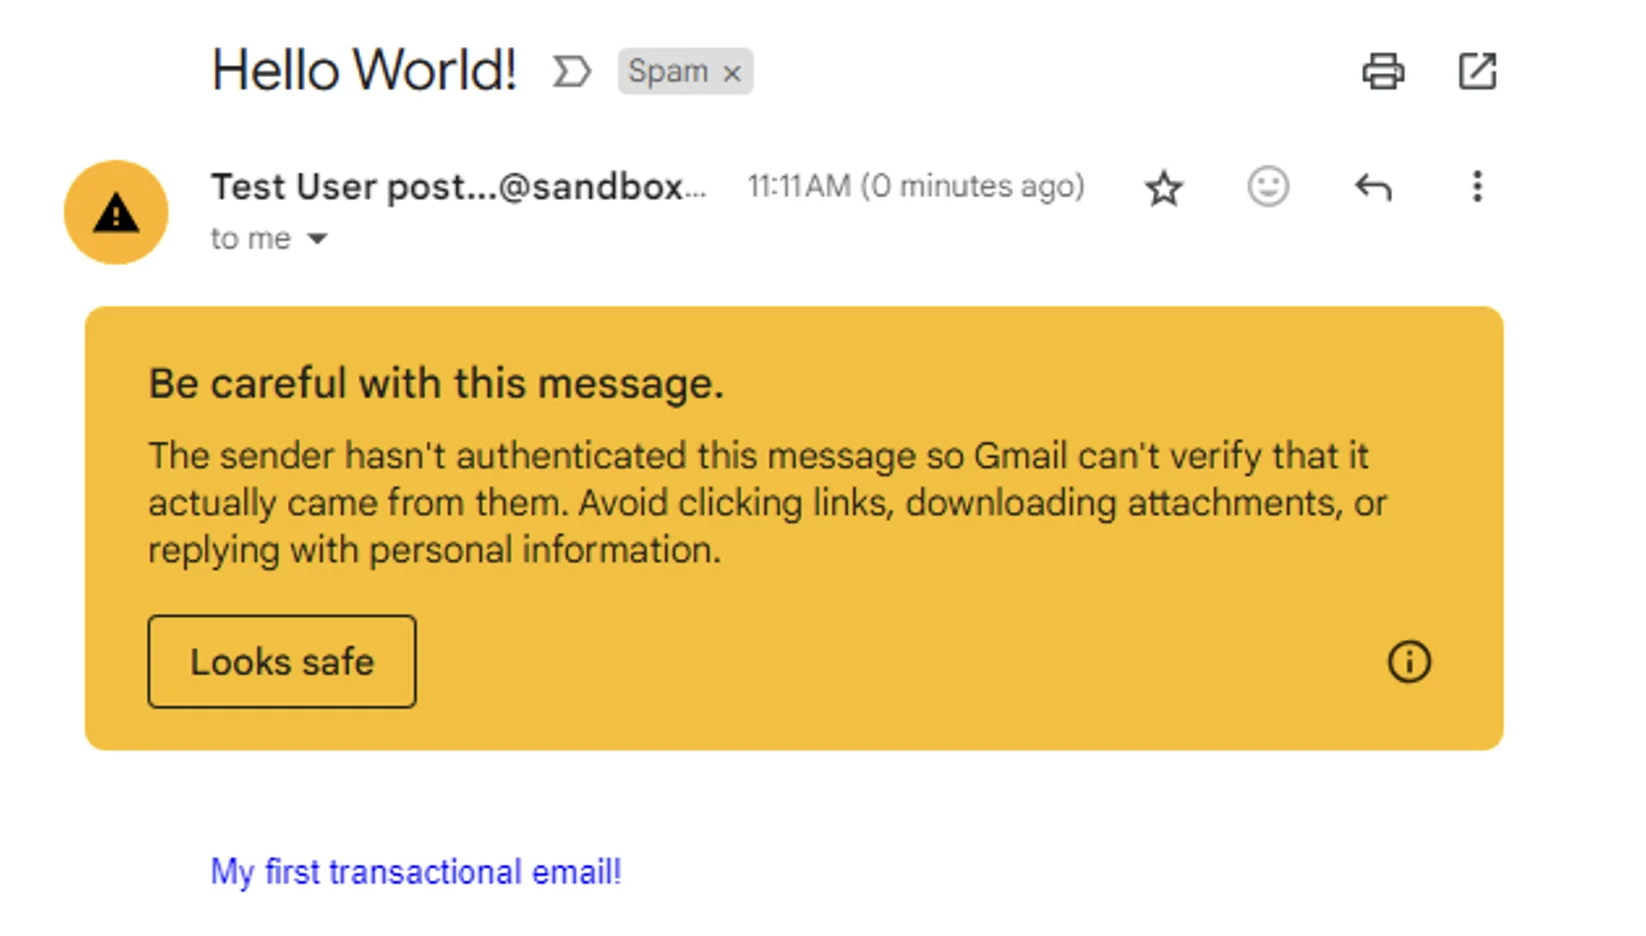
Execute dotnet run from your terminal to start your web application. Then, open a web browser and navigate to /order/confirm. You should get an email in your inbox within a couple of seconds:
Handle responses and errors
Unfortunately, sometimes things go wrong. For instance, your API key could have a typo, maybe you didn’t add all the required fields to the HTTP request, or you could hit Mailgun’s rate limits.
A failed HTTP request to Mailgun’s API will return one of four different HTTP error codes:
- 400: Something with the formatting of the request is wrong.
- 401: Authentication failed.
- 429: You’ve reached Mailgun’s rate limit.
- 500: Something on the network or Mailgun’s end went wrong.
Let’s take a look at how you can handle some of these failure scenarios.
Handle 400 error codes
Whenever you get a 400 HTTP status code returned, it means that your payload or formatting was incorrect. For example, Mailgun will respond with a 400 HTTP status code if a required field is missing.
In these cases, there’s a general approach that you can take:
- Throw an exception, as this is a failure scenario that’s not recoverable.
- Log the exception and the reasons for the exception.
Here’s what the code for this could look like:
if (!result.IsSuccessStatusCode)rn{rn var status = (int) result.StatusCode;rnrn if (status == 400)rn {rn var responseContent = await result.Content.ReadAsStringAsync();rn var exception = new BadHttpRequestException("Mailgun 400 HTTP status code");rnrn this._logger.LogError(exception, exception.Message, responseContent);rn throw exception;rn }rn}rn
You may also want to take a similar approach with the 401 HTTP status code.
Handle 500 error codes
Whenever you receive a 500 HTTP status code, it may mean something has gone wrong on Mailgun’s side or a general network issue was experienced. In these cases, there are a few different approaches you could take:
- Queue the email to be attempted again later.
- In the same code path, retry after a short period.
- Employ an advanced technique like a circuit breaker
Here’s what a basic retry approach might look like:
if (!result.IsSuccessStatusCode)rn{rn var status = (int) result.StatusCode;rnrn if (status == 500)rn {rn // Retry the email after 1 second in hopes that the error was transientrnrn await Task.Delay(1000);rn result = await _httpClient.PostAsync(string.Empty, form);rnrn if (!result.IsSuccessStatusCode)rn {rn // Log and throw an exception like you did in the previous examplern }rn }rn}rn
In this scenario, if you receive a 500 status code, you’ll wait for one second and try the HTTP request again. If the retried request also has a failure, then you’ll log and throw an exception in the same way that you did for the 400 status code scenario.
To give you an idea of what the overall code might look like, here’s a skeleton of how your code could begin to handle various error scenarios:
if (!result.IsSuccessStatusCode)rn{rn var status = (int)result.StatusCode;rnrn if (status == 400)rn {rn // Log the error and notify the development team that thern // request was not formatted properly.rn }rn else if (status == 401)rn {rn // Log the error and notify the development team that thern // request's authentication failed.rn }rn else if (status == 429)rn {rn // Use a .NET library like Polly to throttle or try this requestrn // again with an exponential back-off, etc.rn }rn elsern {rn // Something went wrong: log the error and apply a distributed rn // error handling technique like a circuit breaker.rn // See https://learn.microsoft.com/en-us/azure/architecture/patterns/circuit-breaker for more.rn }rn}rn
Production-ready email integration
At this point, you’ve sent an email with .NET and C#, but to get production ready, there are a few important things to consider.
Secure your API key
You cannot store your real production API key in source code. Additionally, it should not be accessible by anyone in plain text files.
There are many tools you can use to secure your API key. Every cloud provider has its own key management system that allows your application to retrieve your secrets securely. For example, Azure Key Vault or AWS Secrets Manager work great.
Other production-grade features
Mailgun also supports many production-grade features you may need, such as:
- Adding attachments to your emails
- The ability to create reusable email templates
- Personalization features like variables and tags
- CC, BCC, and reply-to headers
Integrate with the .NET ecosystem
To demonstrate how easy it is to integrate with production-ready tooling from the .NET ecosystem, go ahead and use an open source library like Coravel to enhance the reuse and developer experience of your solution.
Execute dotnet add package coravel.mailer from your terminal while in the MailDemo folder.
Then, add the following JSON entry to your appsettings.json file:
"Coravel": {rn "Mail": {rn "From": {rn "Name": "Test User",rn "Email": "postmaster@<Your sandbox domain>"rn }rn }rn}rnNext, create a class file called MailgunMailer.cs that implements the ICanSendMail interface. You might notice that this is essentially the same logic you originally had in OrderController:rnusing System.Net.Mime;rnusing System.Text;rnusing Coravel.Mailer.Mail;rnrnnamespace MailDemo;rnrnpublic class MailgunMailer : ICanSendMailrn{rn private readonly HttpClient _httpClient;rn private readonly IConfiguration _config;rnrn public MailgunMailer(IHttpClientFactory httpClientFactory, IConfiguration config)rn {rn this._httpClient = httpClientFactory.CreateClient("Mailgun");rn this._config = config;rn }rnrn public async Task SendAsync(MessageBody message, string subject, IEnumerable<MailRecipient> to, MailRecipient from, MailRecipient replyTo, IEnumerable<MailRecipient> cc, IEnumerable<MailRecipient> bcc, IEnumerable<Attachment>? attachments = null, MailRecipient? sender = null)rn {rn using MultipartFormDataContent form = new();rnrn void SetFormParam(string key, string value) =>rn form.Add(new StringContent(value, Encoding.UTF8, MediaTypeNames.Text.Plain), key);rnrn if (from is not null)rn {rn SetFormParam("from", $"{from.Name} <{from.Email}>");rn }rn elsern {rn // This gives you a default "from" field if not defined by the callerrn SetFormParam("from", $"{this._config.GetValue<string>("Coravel:Mail:From:Name")} <{this._config.GetValue<string>("Coravel:Mail:From:Email")}>");rn }rnrn foreach (var recipient in to)rn {rn SetFormParam("to", recipient.Email);rn }rn SetFormParam("subject", subject);rnrn if (message.HasHtmlMessage())rn {rn SetFormParam("html", message.Html);rn }rnrn if (message.HasPlainTextMessage())rn {rn SetFormParam("text", message.Text);rn }rnrn var result = await _httpClient.PostAsync(string.Empty, form);rnrn // Error handling logic...rn }rn}rn
Next, you need to tell Coravel to use this mailer. In your Program.cs file, before var app = builder.Build() is called, add the following:
builder.Services.AddScoped<MailDemo.MailgunMailer>();rnbuilder.AddCustomMailer<MailDemo.MailgunMailer>();rnFinally, replace the code for OrderController with the following:rnusing Microsoft.AspNetCore.Mvc;rnusing Coravel.Mailer.Mail.Interfaces;rnusing Coravel.Mailer.Mail;rnrnnamespace MailDemo.Controllers;rnrnpublic class OrderController : Controllerrn{rn private readonly IMailer _mailer;rnrn public OrderController(IMailer mailer)rn {rn this._mailer = mailer;rn }rnrn public async Task<IActionResult> Confirm()rn {rn var mailable = Mailable.AsInline()rn .To("jamesmichaelhickey@gmail.com")rn .Subject("Hello World!")rn .Html(@"<html><body><p style=""color:blue;"">My first transactional email!</p></body></html>")rn .Text("My first transactional email!");rnrn await _mailer.SendAsync(mailable);rnrn return new JsonResult(@"Your order was confirmed. You should get an email soon!");rn }rn}rn
After a little bit of a one-time configuration, you’ll notice the logic for sending emails from your application code is much easier to understand and less verbose.
You’ve also added support through Mailgun and Coravel to define both HTML and plain text email bodies. Mailgun recommends sending both HTML and plain text together. It’s best to send multipart emails using both text and HTML, or text only. Sending HTML-only email is not well received by ESPs.
Wrapping up
Mailgun offers a straightforward HTTP API to send emails from your .NET solutions efficiently and securely. In this article, you learned how to integrate Mailgun’s HTTP API into a C# web application and begin adding production-grade tooling along with Mailgun’s production-ready capabilities.
By using Mailgun and .NET together, your transactional emails can scale efficiently with .NET async/await functionality, the framework’s overall high-performance web infrastructure, additional tooling from the .NET ecosystem, and Mailgun’s performant and straightforward HTTP API.
Was this helpful? Subscribe to our newsletter to get updates on tutorials, emails news, and insights from our resident email geeks.