IT & Engineering
Send email using Python3 and the Mailgun API
If you’re looking to streamline your approach to programmatically sending email, you’re in good hands. Our developers have the experience you need to get started. Read on as we delve into the details of integrating Python3 with Mailgun’s robust email API, with insights, guidance, and optimizations along the way.
Getting started: What you’ll need for this tutorial
When sending email, you have two choices, manual, or programmatic. When we’re talking about transactional emails specifically, programmatic is the way to go. Instead of sending important email updates or notifications manually, you can use automated email scripts to save time and reduce errors.
Scripts — small programs that automate tasks — offer a more efficient way to send bulk emails, schedule messages, or get called directly from your application. Some use cases for sending emails through automated scripts include the following:
- Sending welcome emails for user registration
- Sending notifications and alerts from applications, such as informing users about their service usage or notifying admins when server resources are running low
- Sending reports, such as a weekly new customer report
- Sending marketing campaigns – for instance, to promote new products or services
In this tutorial, you’ll learn how to send emails using Python3 scripts and the Mailgun API.
Prerequisites
To follow along with this Python3 and email API tutorial, you’ll need the following:
- Python 3.9 or higher. Python is often described as the Swiss Army knife of programming languages, and it offers a wide range of capabilities. In addition to its many other uses, Python is great for writing various scripts.
- A Mailgun account. Mailgun is an email-sending platform that lets you send and track emails. If you aren’t already a Mailgun user, you can follow along with this tutorial using our free trial.
Setting up a new Python project
Let’s dive in.
Start by creating a suitable directory for your Python project and add an empty .env file inside it. Before proceeding, consider creating and activating a new virtual environment before installing the Python libraries required for this tutorial. It isolates your project, which prevents any dependency conflicts.
To install the necessary libraries (requests and python-dotenv) using pip in your virtual environment, run the following command:
pip install requests python-dotenv
The requests library allows you to make API calls, while the python-dotenv library allows you to store the API key outside your code.
Obtaining an API key with Mailgun
Next, you’ll obtain an API key from your Mailgun account, which you’ll use to make API calls to Mailgun.
Sign in to your Mailgun account and create an API key from the API Security page, which is accessible via a drop-down below your name in the top right corner.
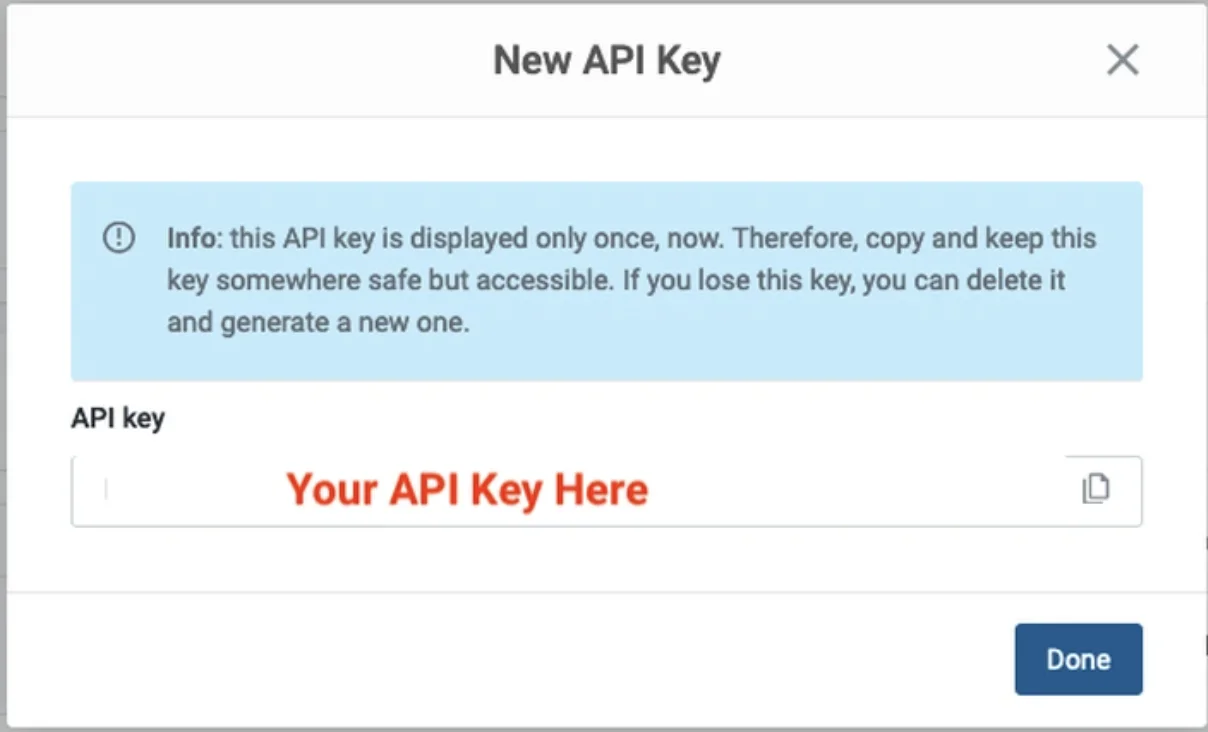
Copy and paste this API key into your project’s .env file.
MAILGUN_API_KEY=”Your API Key Here”
While you’re in Mailgun, note down your sending domains from the Mailgun dashboard.
If you’re on a free plan, you will see a sandbox domain, which will be used in the API endpoint as well as for the from email address when sending emails through the Mailgun API. The sandbox domain follows the format <your-sandbox-id>.mailgun.org, as shown below.

You will need to upgrade to a paid plan if you need to use a custom email domain for sending emails through Mailgun. The free plan only allows the sandbox domain, and you can send emails to a maximum of five verified addresses. However, this free plan is useful during the development phase when integrating the Mailgun API into your system.
Imports and initialization
Next, create the file main.py in your project directory and copy and paste this code:
```python import jsonrnimport requestsrnimport loggingrnrnimport osrnfrom dotenv import load_dotenvrnrnlogging.basicConfig(level=logging.INFO) # set log levelrnload_dotenv() # for reading API key from `.env` file.rnrn# Sandbox API URL format: https://api.mailgun.net/v3/sandbox<ID>.mailgun.org/messagesrnMAILGUN_API_URL = "https://api.mailgun.net/v3/YOUR_DOMAIN_NAME/messages"rnFROM_EMAIL_ADDRESS = "Sender Name <SENDER_EMAIL_ID>"
It uses Python’s standard logging and configures it to INFO level with this code:
```pythonrnlogging.basicConfig(level=logging.INFO)rn```
The load_dotenv() function comes from the python-dotenv library and is used to load environment variables from the .env file in your Python code. It is a good practice to store and read sensitive information such as credentials and API keys from the .env file.
MAILGUN_API_URL sets the API URL for your Python script, and indicates the sender’s email ID. Both must use your email sending domain or the sandbox domain mentioned earlier.
Sending single emails using the Mailgun API
Let’s first look at the most simple way of using Mailgun API: sending a single email. You can use it for one-off cases, like sending a reminder or a follow-up email to your high-value customer. This will allow you to track the email delivery as well.
Copy and paste the code below into your main.py file after the imports and initialization:
```pythonrndef send_single_email(to_address: str, subject: str, message: str):rn try:rn api_key = os.getenv("MAILGUN_API_KEY") # get API-Key from the `.env` filernrn resp = requests.post(MAILGUN_API_URL, auth=("api", api_key),rn data={"from": FROM_EMAIL_ADDRESS,rn "to": to_address, "subject": subject, "text": message})rn if resp.status_code == 200: # successrn logging.info(f"Successfully sent an email to '{to_address}' via Mailgun API.")rn else: # errorrn logging.error(f"Could not send the email, reason: {resp.text}")rnrn except Exception as ex:rn logging.exception(f"Mailgun error: {ex}")rnrnif __name__ == "__main__":rn send_single_email("Manish <manish@exanple.com>", "Single email test", "Testing Mailgun API for a single email")rn```
This send_single_email(…) function takes three arguments: to_address, subject, and message. to_address is for a single email address, and the other two are for the email’s subject and content.
The code reads the Mailgun API key from the .env file and uses it to make an API call, establishing a secure connection to the specified API_URL. This API key acts as a unique identifier, allowing Mailgun to authenticate the API call and verify who is using its services.
You must use your unique API key to ensure proper authentication. The from email address used in this API call must also be associated with your valid domain or Mailgun’s sandbox domain. If it doesn’t, the call will fail with an error message.
The data parameters are sent via HTTP POST method to the API endpoint with the requests.post(…) call.
When the API call is successful, your email will be queued for delivery, and the API will return an HTTP-200 (OK) status. In case of an error, the API will return an error message with an appropriate HTTP status code. Both cases are appropriately logged by this code snippet.
if __name__ == “__main__” shows how this function can be called in your script.
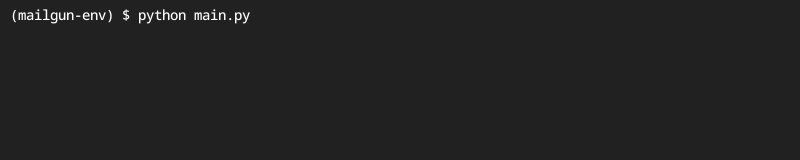
Running this script in your terminal will show the following:

Sending bulk email with the Mailgun API
While you can use the send_single_email(…) function in a loop to send emails to multiple recipients, it’s not the most efficient method due to network I/O delays. This approach may also encounter API rate limiting.
Instead, use Batch Sending for sending emails to multiple recipients. The code snippet below demonstrates how to use it in your Python script.
Copy and paste the send_batch_emails(…) function into your main.py file after the send_single_email(…) function, and modify the __main__ part as shown below:
```pythonrndef send_batch_emails(recipients: dict, subject: str, message: str):rn try:rn api_key = os.getenv("MAILGUN_API_KEY") # get API-Key from the `.env` filernrn to_address = list(recipients.keys()) # get only email addressesrn recipients_json = json.dumps(recipients) # for API callrnrn logging.info(f"Sending email to {len(to_address)} IDs...")rn resp = requests.post(MAILGUN_API_URL, auth=("api", api_key),rn data={"from": FROM_EMAIL_ADDRESS,rn "to": to_address, "subject": subject, "text": message,rn "recipient-variables": recipients_json})rn if resp.status_code == 200: # successrn logging.info(f"Successfully sent email to {len(recipients)} recipients via Mailgun API.")rn else: # errorrn logging.error(f"Could not send emails, reason: {resp.text}")rn except Exception as ex:rn logging.exception(f"Mailgun error: {ex}")rnrnif __name__ == "__main__":rn # send_single_email("Manish <manish@exanple.com>", "Single email test", "Testing Mailgun API for a single email")rn _recipients = {"manish@example.com": {"name": "Manish", "id": 1},rn "jakkie@example.com": {"name": "Jakkie", "id": 2},rn "elzet@example.com": {"name": "Elzet", "id": 3}}rnrn send_batch_emails(_recipients, "Hi, %recipient.name%!", "Testing Mailgun API. This email is sent via Mailgun API.")rn```
How can I send multiple personalized emails?
Batch Sending uses a special parameter called Recipient Variables that lets you send personalized emails to multiple recipients in a single API call. Using Recipient Variables with Batch Sending ensures Mailgun sends individual emails to each recipient in the to field. Without it, each recipient will see all recipients’ email addresses in the to field.
Here is one such recipient variable, with email addresses as keys and the corresponding “name” and “id” as values:
{“manish@example.com”: {“name”: “Manish”, “id”: 1},
“jakkie@example.com”: {“name”: “Jakkie”, “id”: 2},
“elzet@example.com”: {“name”: “Elzet”, “id”: 3}}
The send_batch_emails(…) function has three parameters: recipients, subject, and message. Note that recipients is a dictionary object representing the recipient variable discussed above.
The code first extracts email addresses from this dictionary using to_address = list(recipients.keys()), then converts the dictionary to JSON for API use with the recipients_json = json.dumps(recipients) call.
The recipients_json variable is passed in the API call for the recipient-variables field, which is used for personalizing the email subject and content. The subject is specified as follows:
“Hi, %recipient.name%!”
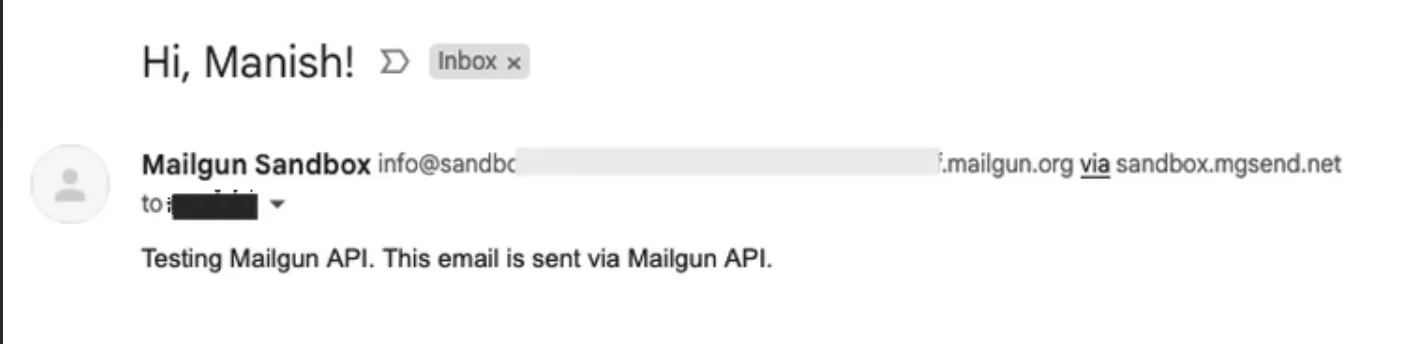
The Mailgun API correctly substitutes each recipient’s name from the JSON while sending emails with %recipient.name%. So, in the example above, Manish, Jakkie, and Elzet will receive personalized subject lines—”Hi, Manish!” “Hi, Jakkie!”, and “Hi, Elzet!”. Similarly, you can personalize the email content using any %recipient.KEY-NAME% value.
The rest of the send_batch_emails(…) code is similar to the send_single_email(…) function, except that it sends multiple email recipients in a single API call.
Running this script will show the following:
Here’s an example of how this email will appear in the recipient’s inbox:
Additional features of Mailgun’s email API
The Mailgun API offers several additional features to make your life easier.
Sending HTML emails with attachments
The Mailgun API lets you send emails with attachments, whether with text or HTML content. You can use the same API endpoint (https://api.mailgun.net/v3/YOUR_DOMAIN_NAME/messages) with an additional ‘attachment’ passed to the files parameter, as shown below:
```pythonrnfiles = {'attachment': open('weekly-report.csv', 'rb')} # file you want to attachrnresp = requests.post(MAILGUN_API_URL, auth=("api", api_key), files=files,rn data={"from": FROM_EMAIL_ADDRESS,rn "to": to_address, "subject": subject, "text": message})rn```
Email delivery and tracking
Mailgun provides detailed email tracking, including when emails are delivered or opened, links are clicked, emails bounce, users unsubscribe, and emails are marked as spam. This data is made available via the control panel on the dashboard and through the API.
Mailgun also permanently saves emails if they can’t be delivered (hard bounce) or if a recipient unsubscribes or marks the email as spam. In these cases, Mailgun won’t try to send emails to those recipients again.
Email templates
The Mailgun API allows you to create HTML templates for standardizing your email layout and making them more appealing with predesigned layouts and standard content.
You can find templates in the left sidebar under the Sending menu.
Email testing
Mailgun also provides email testing tools to help ensure your messages look and perform as expected. With Inspect, you can automatically check for issues like broken links, missing images, or spam triggers. The Email Preview feature lets you see how your email will render across different clients and devices, while Email Accessibility testing helps confirm your content is compliant with accessibility standards. You can learn more about Mailgun’s email testing software and integrate these checks into your workflow when building emails with the API.
Alternative Python email libraries
Before reaching for a dedicated email API, it’s worth understanding the native tools Python provides for sending email, along with a few lightweight third-party options.
Python includes two core modules for SMTP-based email: smtplib and email.
smtplib
The smtplib module manages SMTP sessions, allowing you to connect to an SMTP server using SMTP_SSL() for implicit TLS (typically port 465) or SMTP() with starttls() for opportunistic TLS (commonly port 587). Authentication is handled with a standard username and password.
The email package is responsible for message construction. EmailMessage offers a modern, high-level API, while MIMEText and MIMEMultipart support plain text, HTML, and multipart payloads.
This code builds a simple email and sends it securely through an SMTP server using Python:
                                from email.message import EmailMessage
import smtplib

msg = EmailMessage()
msg["From"] = "you@example.com"
msg["To"] = "friend@example.com"
msg["Subject"] = "Hello"
msg.set_content("Sent with Python!")

with smtplib.SMTP("smtp.example.com", 587) as smtp:
    smtp.starttls()
    smtp.login("username", "password")
    smtp.send_message(msg)
Yagmail
Several third-party libraries further reduce boilerplate. Yagmail provides a Gmail-focused abstraction for sending messages and attachments with minimal configuration. python-emails adds higher-level features such as template rendering, structured message composition, and DKIM signing.
As a general rule, avoid hard-coding credentials. Use Python’s getpass() for secure password input, store API keys in environment variables, and always transmit email over TLS-encrypted connections.
Authentication and security
It’s important to keep some best practices and tips in mind when you send emails programmatically.
Error handling
When your script uses a third-party API like Mailgun to send emails, you must handle potential errors related to network or API failures and API responses indicating errors to ensure your script works smoothly, can detect issues like invalid API keys or URLs, and knows when emails aren’t sent by the Mailgun API. Without error handling, your script might fail silently, resulting in undelivered emails.
The code snippets above all provide for handling errors that might occur. Firstly, they check the response status code (resp.status_code). If it’s not successful (HTTP 200), they log the error message so you can debug the issue.
Both the send_single_email(…) and send_batch_emails(…) functions also use a try-except block to ensure any exceptions are caught and logged correctly.
Email deliverability
Email deliverability means ensuring your emails land in the recipient’s inbox, not their spam folder. You need a good sender reputation to achieve high deliverability. When we’re talking about building programmatic sending, there are a couple specific things we can look at to improve your email deliverability including authentication, and optimizing emails to be responsive.
Authenticate your email
Use SPF, DKIM, and DMARC to validate your identity as a sender. Only send emails to verified subscribers who have opted in to receive them and regularly remove inactive subscribers and those who mark your emails as spam.
DMARC is becoming an industry requirement. Learn more about why, and what this authentication standard does in our post on the DMARC perspective.
Start sending with Python3 and Mailgun’s Email API
In this article, you learned how to send emails using a Python script and the Mailgun API. You also learned about Mailgun features like email tracking and templates and the importance of error handling, optimizing deliverability, and sending responsive emails.
Email geeks help other email geeks. You can find the code discussed in this tutorial in this GitHub repo.
Was this helpful? If so, be sure to subscribe to our newsletter for more tutorials, announcements, and industry insights.
FAQs
Use TLS (STARTTLS) on port 587 when you want to upgrade a plain connection to encrypted, and SSL (implicit TLS) on port 465 when the connection starts encrypted.
- TLS (STARTTLS): smtplib.SMTP(host, 587) → starttls() → login() → send_message()
- SSL (implicit TLS): smtplib.SMTP_SSL(host, 465) → login() → send_message()
In both cases, construct the message (for example with EmailMessage) and send it with smtp.send_message(msg). Always authenticate using SMTP credentials (username/password) provided by your provider.
- EmailMessage: Modern, high-level API. Best default choice for most use cases. Makes it easy to set headers, add plain text, add HTML alternatives (add_alternative()), and attach files with less boilerplate.
- MIMEText: Lower-level building block for a single text part (plain text or HTML). Useful when you want explicit control over a single body part.
- MIMEMultipart: Container for combining multiple MIME parts (text + HTML + attachments). Common in older examples; you manually attach MIMEText parts and files.
If you’re starting fresh, prefer EmailMessage unless you need compatibility with older MIME-building patterns.
Use environment variables for credentials in deployed apps (CI/CD, containers, servers), and getpass() for interactive local scripts.
Environment variables keep secrets out of source control and logs. Store values like SMTP usernames/passwords or API keys as SMTP_USER, SMTP_PASS, MAILGUN_API_KEY, etc., and read them at runtime.
getpass.getpass() securely prompts for a password without echoing it to the terminal—useful for quick scripts or local testing.
A common pattern is: read from env first, and fall back to getpass() only if missing.
Yagmail is designed specifically for Gmail workflows, so it reduces SMTP boilerplate and smooths out common Gmail tasks.
Key advantages for Gmail users:
- Less code: minimal setup to send messages, HTML, and attachments.
- Gmail-oriented ergonomics: friendlier API for composing messages and handling attachments.
- Faster iteration: good for scripts and internal tools where you want “send email” to be simple without manually managing MIME parts.
If you’re strictly sending through Gmail and want fewer moving pieces than raw smtplib + MIME construction, Yagmail is often the quickest path.
With python-emails, you typically:
- Render a template (often HTML + text) using the library’s templating helpers (or pass pre-rendered content from your own template engine).
- Attach DKIM settings using your domain’s DKIM private key and selector before sending.
In practice, you’ll:
- Build an email object (subject/from/to)
- Provide rendered HTML/text bodies (and optionally variables for templates)
- Configure DKIM signing using:
- a selector (e.g., mailgun or default)
- your signing domain
- the DKIM private key (loaded securely from environment variables or a secrets manager)
For production, keep the DKIM private key out of source code (environment variables or mounted secret files), and validate signing by checking message headers in a mailbox that shows DKIM-Signature and authentication results.