Dev Life
How to send emails using Laravel and Mailgun
Whether you’re sending password resets, order confirmations, or marketing newsletters, reliable email delivery is crucial for any Laravel application. By combining Laravel’s elegant mailing system with Mailgun’s powerful email API, you can ensure your important messages reach the inbox.
In this guide, we’ll walk through the process of integrating Mailgun with Laravel, from initial setup to sending your first automated welcome email. You’ll also learn about advanced features like email tracking, attachments, and proper error handling.
Prerequisites
Before diving into the integration, make sure you have:
- Basic knowledge of Laravel and PHP
- PHP and Composer installed locally
- Node.js and npm installed locally
- A code editor (we’ll use Visual Studio Code)
- A Mailgun account (we’ll help you set this up)
Setting up your Mailgun account
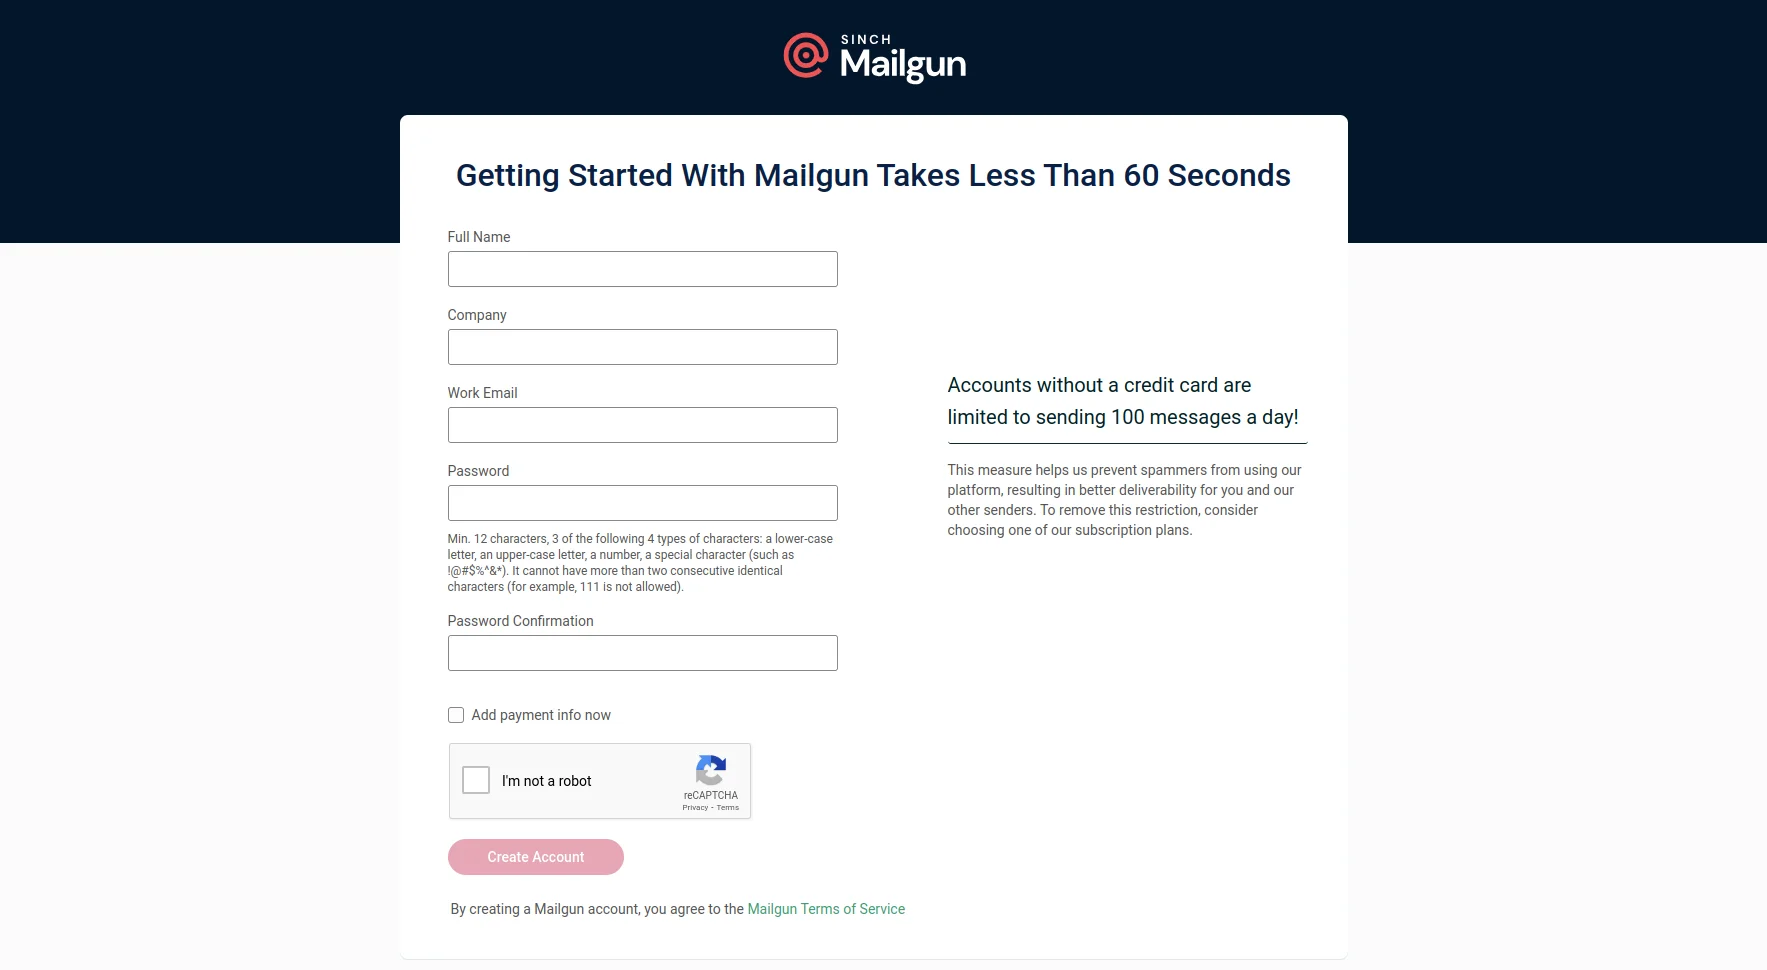
Let’s start by getting your Mailgun credentials ready. If you haven’t already, create a free account at our signup page. After signing up, you’ll need to activate your account through the confirmation email we send you.
From your Mailgun dashboard, collect these three essential pieces:
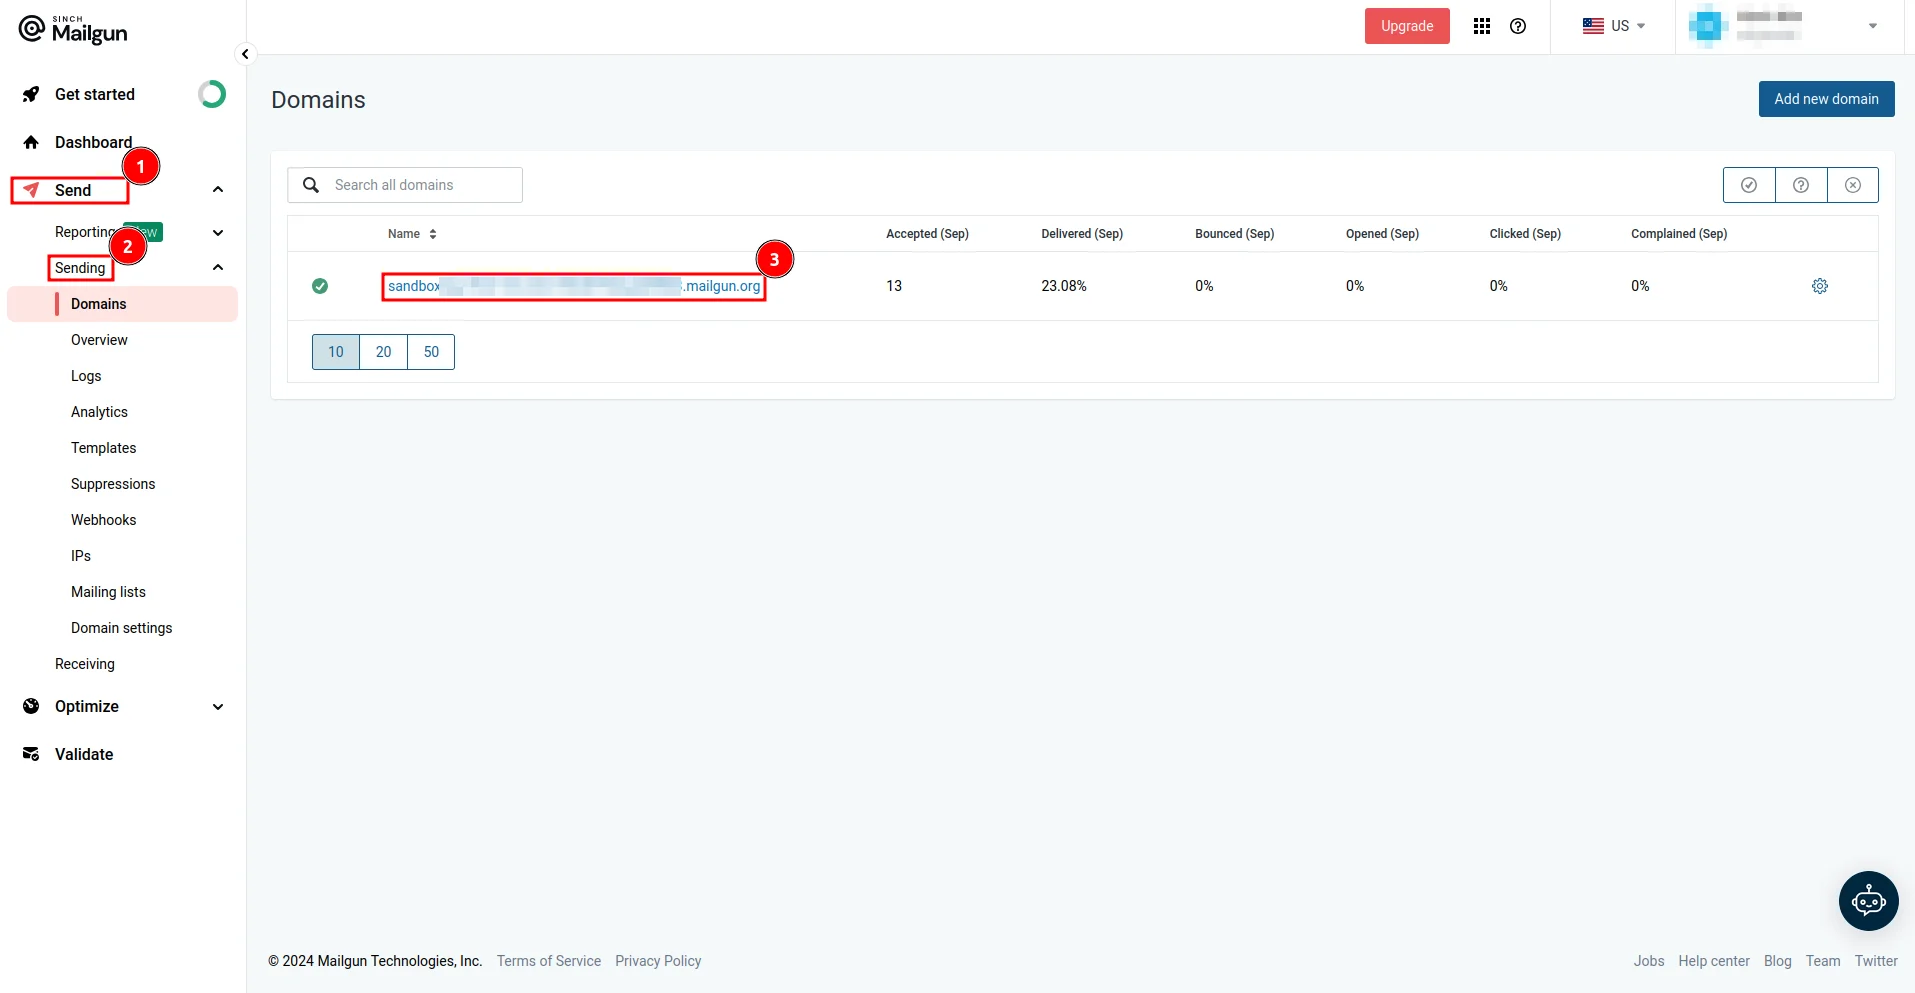
1. Your Mailgun domain: Navigate to Send > Sending > Domains and copy your domain name.
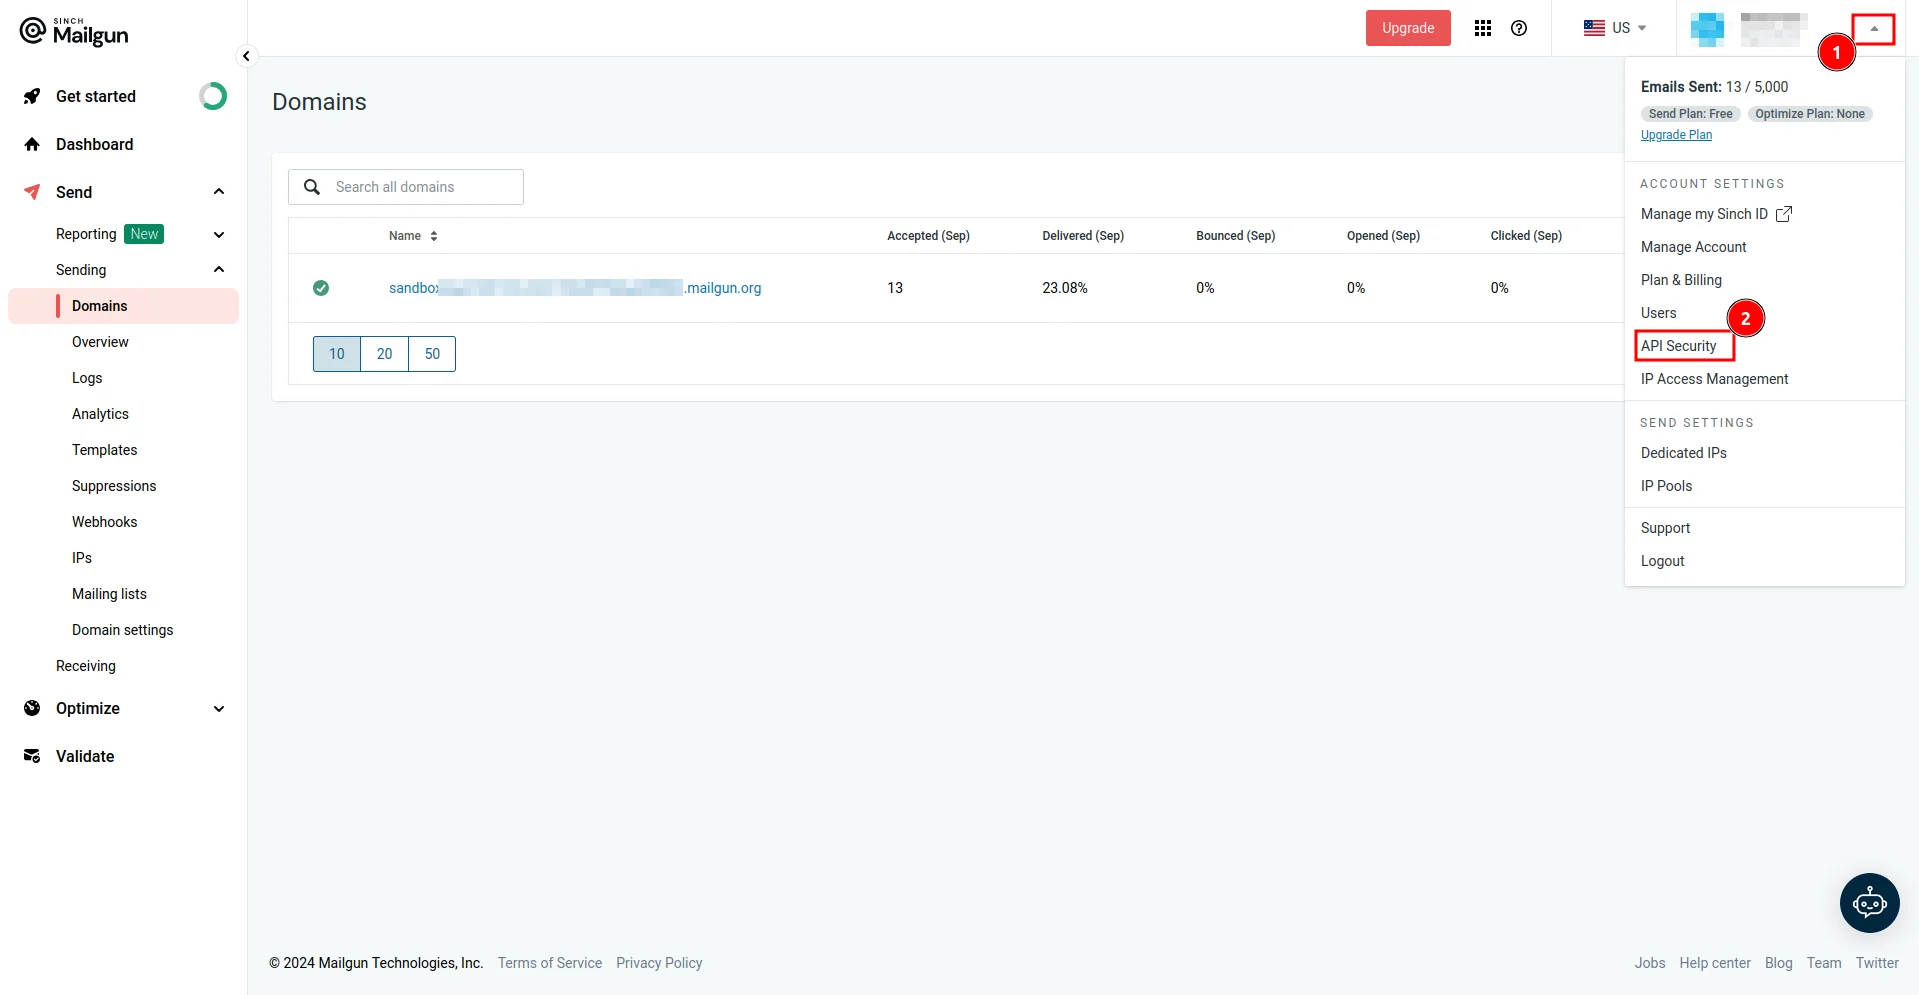
2. Your API key: Click your account dropdown, select API Security, and create a new API key.
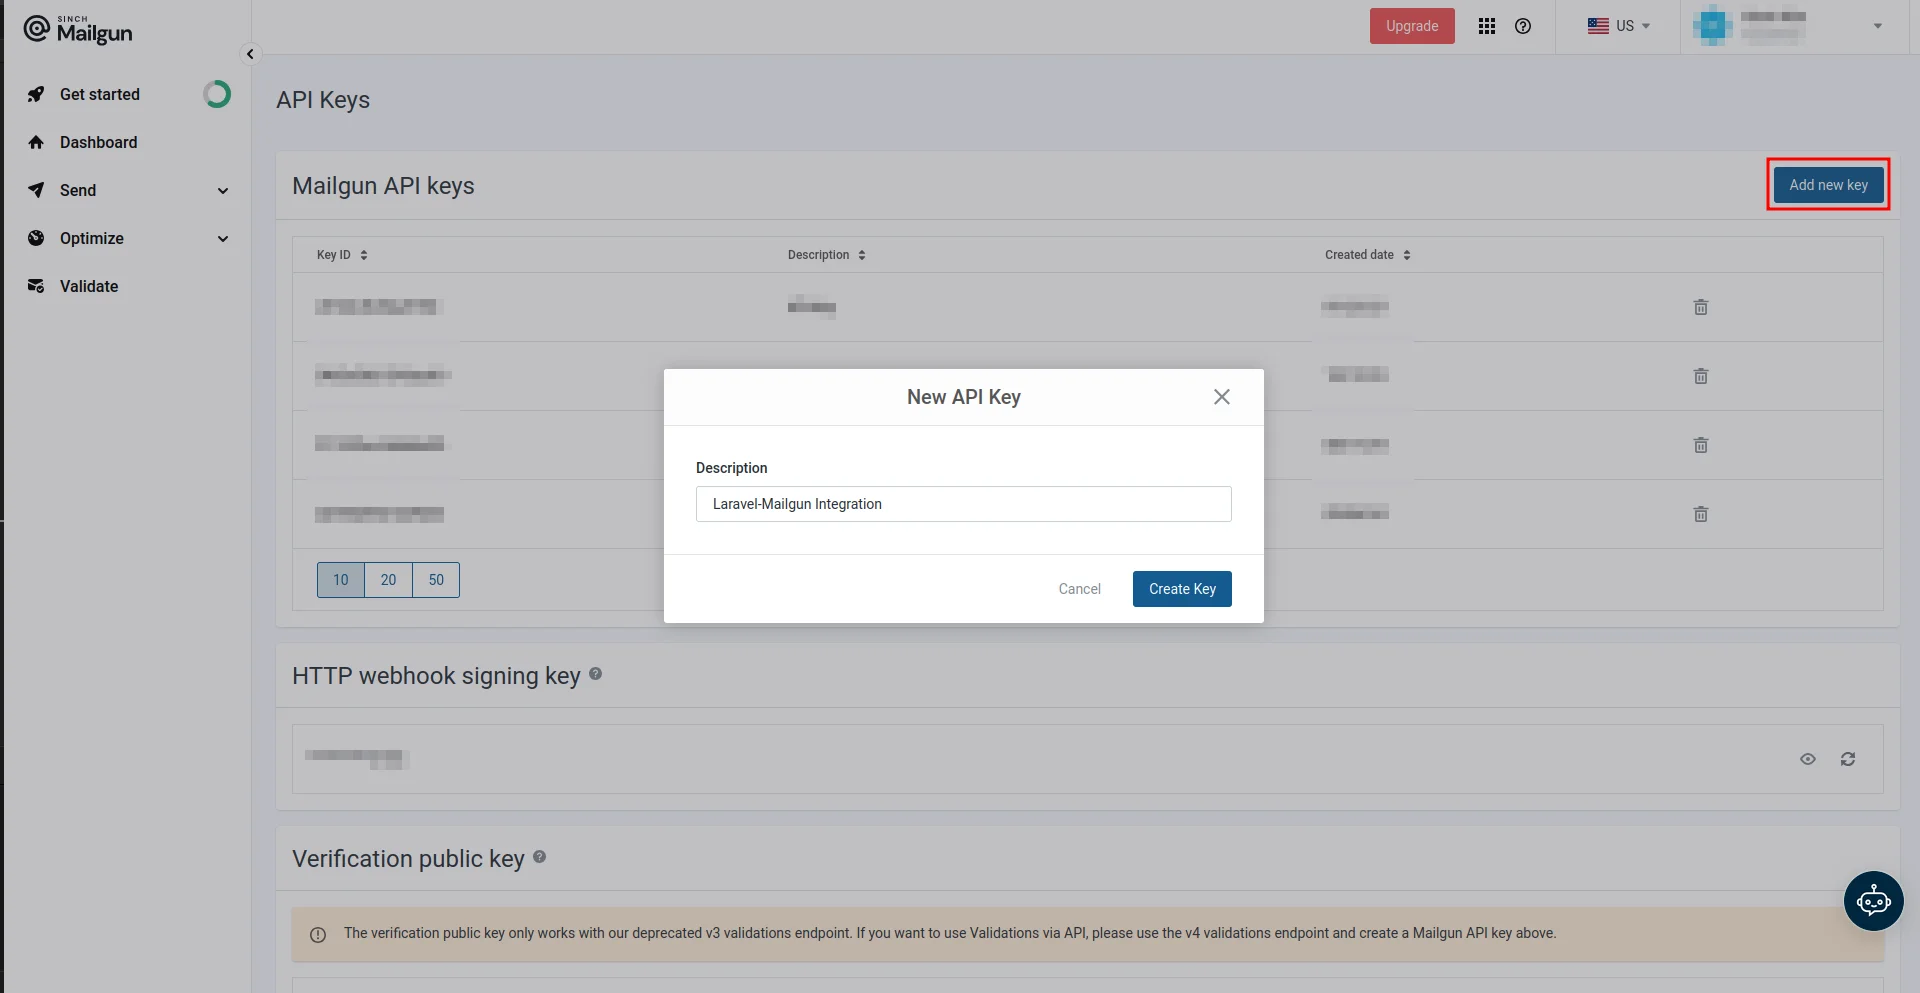
On the API Keys page, create a new API key by clicking the Add new key button and providing the key description in the New API Key modal. Make sure you copy the value of your API key, as you’ll only be able to see it once:
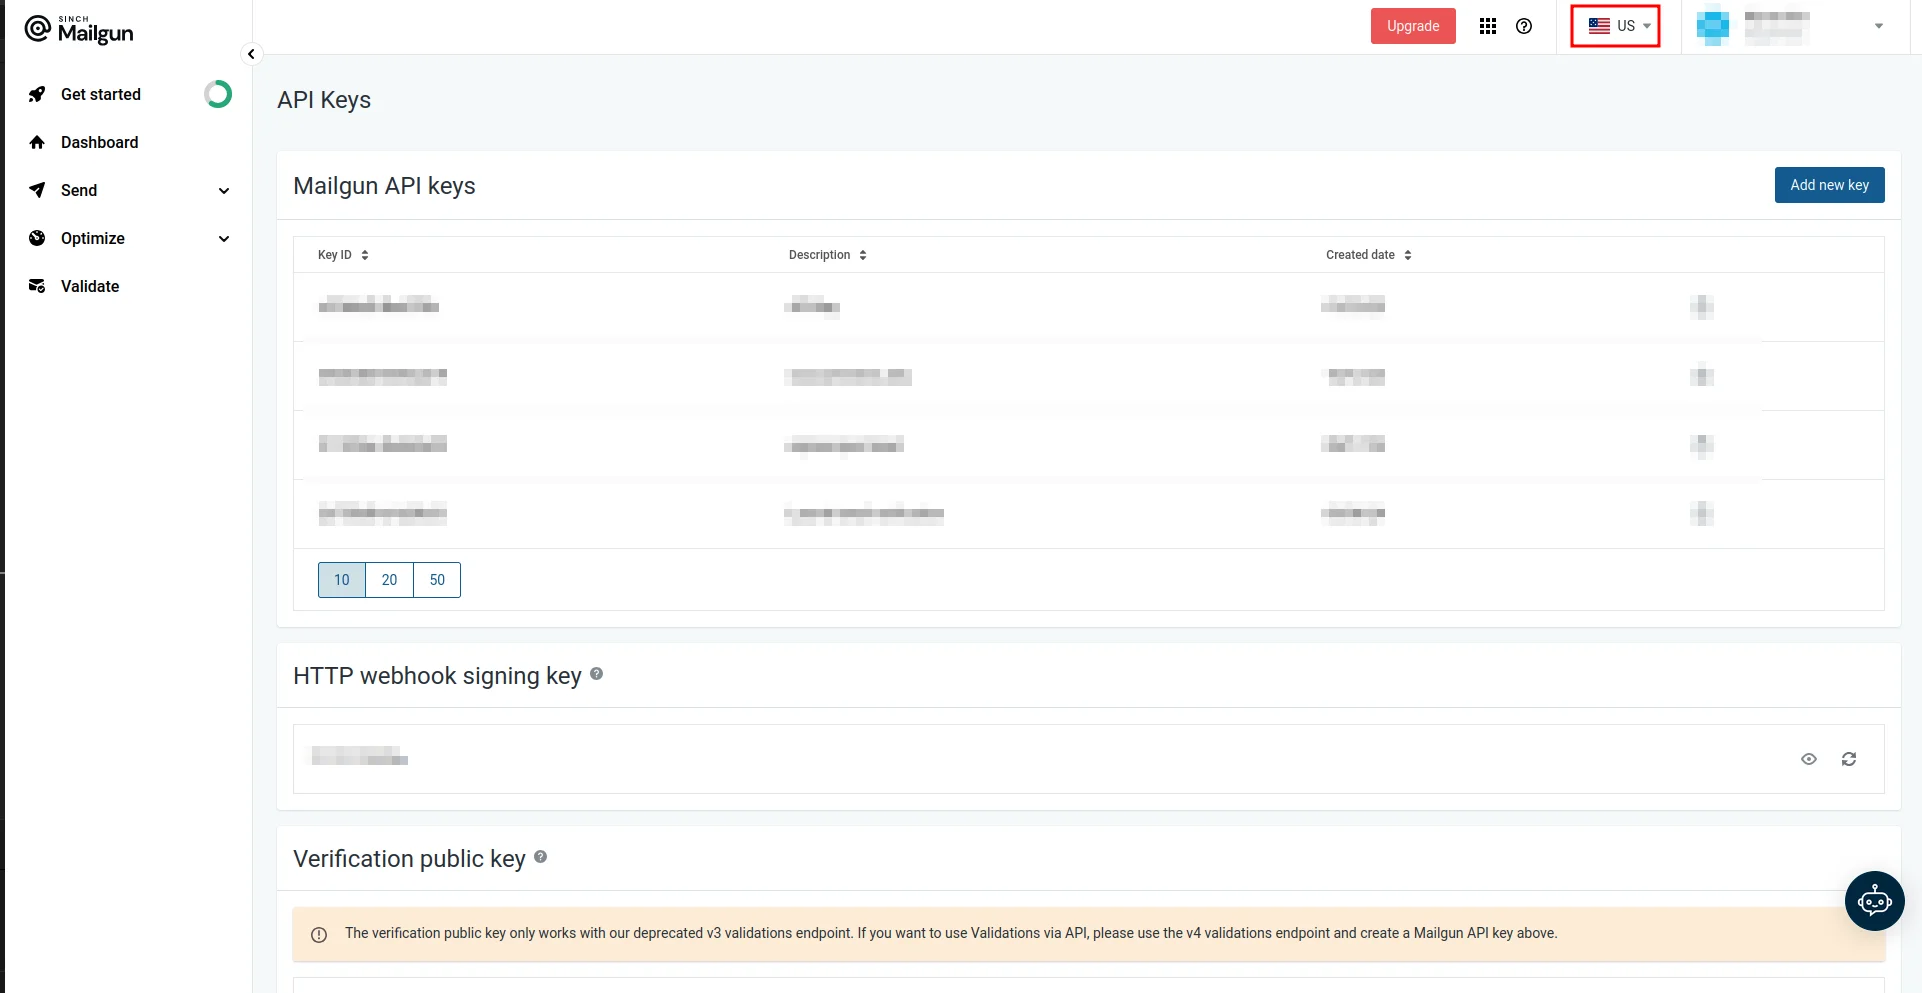
3. Your region: Check the top navigation bar to confirm if you’re in the EU or US region.
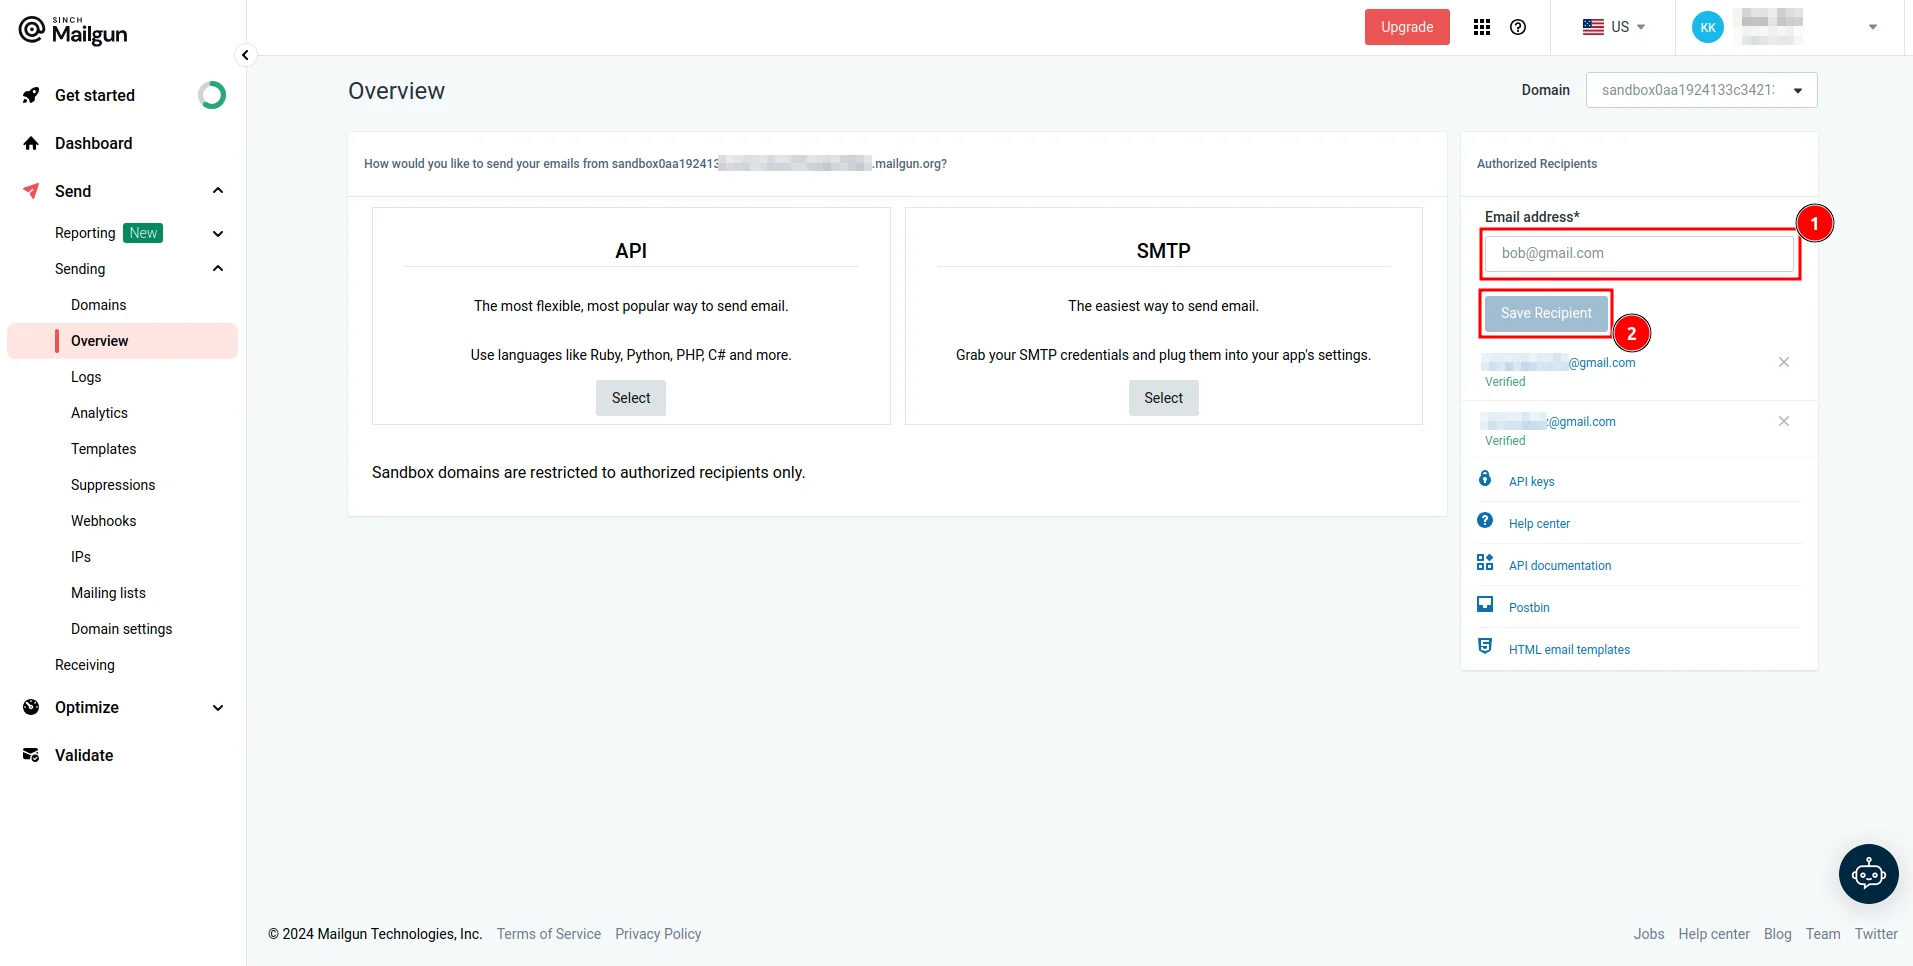
4. Sandbox domain: Lastly, since you’ll be using your sandbox domain in this guide, make sure to configure authorized recipients. This ensures that emails sent from your sandbox domain are only delivered to the recipients you have explicitly authorized, as sandbox domains are limited to testing and are restricted to specific recipients.
You can do this by navigating to your domain’s Overview page, entering the email address, and clicking Save Recipient:
Configuring Laravel for Mailgun
Once you have all the credentials you need from the Mailgun dashboard, it’s time to configure Laravel to use Mailgun. Here, you’ll create a Laravel application and update the mailing-related environment variables with the values you obtained previously. You’ll then send a welcome email to new users.
To achieve this, you’ll use the Laravel Breeze starter kit to set up auth in your application and use the Mail facade to add functionality to send an email to a new user once they register.
To create a Laravel application, execute the following command in your terminal:
Creating your Laravel project
Bash
composer create-project laravel/laravel laravel-mailgun-demo rncd laravel-mailgun-demo rncomposer require laravel/breeze --dev rnphp artisan breeze:install
When prompted, use the following information:
- Which Breeze stack would you like to install? Blade with Alpine
- Would you like dark mode support? No
- Which testing framework do you prefer? PHPUnit
After everything is installed, make sure you compile your application’s frontend assets:
Bash
npm install
Setting up mail configuration
Now that you have a functional Laravel application with authentication set up, you can update the mailing-related environment variables. Open your .env file and comment out MAIL_HOST, MAIL_PORT, MAIL_USERNAME, MAIL_PASSWORD, and MAIL_ENCRYPTION.
Replace the value of MAIL_MAILER with mailgun to set the application to use the Mailgun driver, and replace the value of MAIL_FROM_ADDRESS with your email address.
Next, just below the mail-related environment variables, add the following Mailgun-specific environment variables and make sure to replace the placeholder values with the actual values you obtained from the Mailgun dashboard:
MAILGUN_DOMAIN=<YOUR-MAILGUN-DOMAIN> rnMAILGUN_SECRET=<YOUR-MAILGUN-API-KEY> rnMAILGUN_ENDPOINT=api.mailgun.net
Installing Required Packages
In order to use the Mailgun driver to send emails, you need to install the Symfony Mailgun Mailer transport:
Bash
composer require symfony/mailgun-mailer symfony/http-client
Updating Configuration Files
Once the transport is installed, open your config/mail.php configuration file and add the following configuration to the array of mailers to set up Mailgun as one of the available mailers:
php rnCopy rn'mailgun' => [ rn 'transport' => 'mailgun' rn],
Next, add the following code to the config/services.php file to configure Mailgun:
'mailgun' => [ rn 'domain' => env('MAILGUN_DOMAIN'), rn 'secret' => env('MAILGUN_SECRET'), rn 'endpoint' => env('MAILGUN_ENDPOINT', 'api.mailgun.net'), rn 'scheme' => 'https', rn],
Testing your configuration
This code ensures that your Laravel application has the necessary credentials and settings to communicate with the Mailgun API for sending emails.
At this point, the required configuration is complete. Now, you can test that everything is set up correctly using Tinker.
To launch the Tinker environment, execute the following command in your terminal:
Bash
php artisan tinker
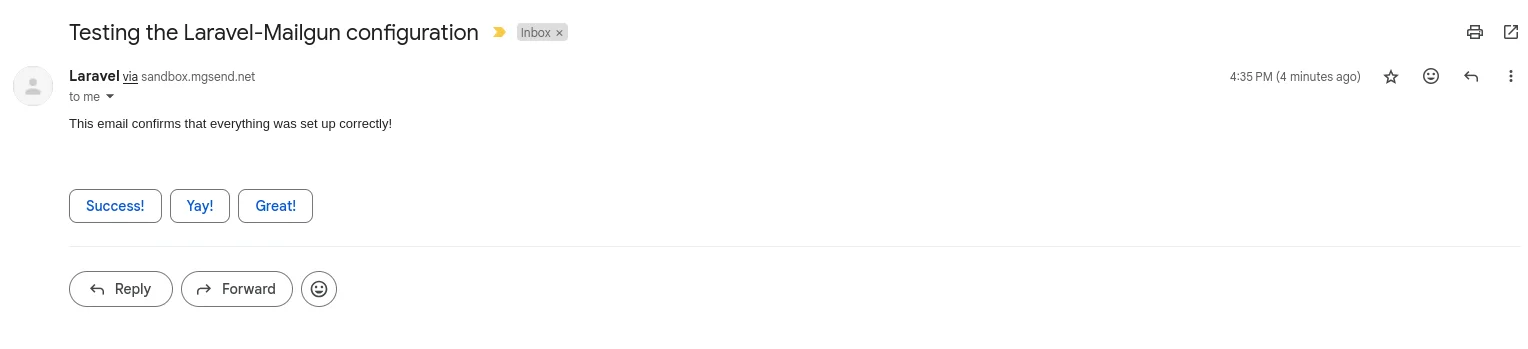
To send a test email, execute the following command in the Tinker terminal:
Mail::raw('This email confirms that everything was set up correctly!', function ($message) { rn $message->to('your@email.com') rn ->subject('Testing Laravel + Mailgun'); rn});
Make sure to replace
This command uses the raw method of the Mail facade to send an email to the provided email address.
Now, check your inbox to make sure you received an email:
Creating welcome emails
To simplify the process of sending emails, Laravel provides mailable classes that allow you to define and structure your email content. Mailable classes make it easy to customize the subject, layout, and data passed to the email view. Here, you’ll create a mailable class that you’ll use to send a welcome email to new users.
To create the mailable class, execute the following command in your terminal:
Bash
php artisan make:mail WelcomeMessage
This command creates a mailable class in the app/Mail/WelcomeMessage.php file. In the mailable class, you need to accept some data that is passed when this class is called. You can do this through the __construct method. Modify this method as shown here:
public function __construct( rn protected User $user, rn) {}
Next, in the envelope method, you can configure the “from” address and the subject of the email. In this example, you’ll only configure the subject of the email since you’re using a global “from” address in the config/mail.php file. Modify the envelope method as follows:
public function envelope(): Envelope rn{ rn return new Envelope( rn subject: 'Welcome to Our Platform', rn ); rn}
Then, in the content method, you need to define the view that will be used to render the contents of the email and pass the name of the user using the with parameter. Modify the content method like this:
public function content(): Content rn{ rn return new Content( rn view: 'emails.welcome', rn with: [ rn 'name' => $this->user->name, rn ], rn ); rn}
Remember to add this use statement to the file:
Creating the email template
Now, you need to create the view you defined previously. Create a new file named emails/welcome.blade.php in the resources/views folder and add the following content:
HTML
<!DOCTYPE html> rn<html> rn <head> rn <title>Welcome to Our Platform</title> rn <style> rn body { rn font-family: Arial, sans-serif; rn background-color: #f4f4f4; rn margin: 0; rn padding: 20px; rn } rnrn .email-container { rn background-color: #ffffff; rn padding: 20px; rn max-width: 600px; rn margin: auto; rn border-radius: 8px; rn box-shadow: 0 0 10px rgba(0, 0, 0, 0.1); rn } rnrn h1 { rn color: #333333; rn font-size: 24px; rn margin-bottom: 20px; rn } rnrn p { rn color: #555555; rn font-size: 16px; rn line-height: 1.5; rn } rnrn .footer { rn margin-top: 20px; rn font-size: 14px; rn color: #777777; rn text-align: center; rn } rn </style> rnrn </head> rn <body> rn <div class="email-container"> rn <h1>Hello, {{ $name }}!</h1> rn <p> rn Thank you for signing up on our platform. We're excited to have rn you on board. rn </p> rn <p> rn Feel free to explore our features, and let us know if you need rn any assistance. rn </p> rn <p>Best regards,<br />{{ config('app.name') }} Team</p> rnrn <div class="footer"> rn <p> rn © {{ date('Y') }} {{ config('app.name') }}. All rights reserved. rn </p> rn </div> rn </div> rn </body> rn</html>
Implementing the welcome email
The above renders a simple welcome message with the user’s name.
Next, you need to configure the controller that handles user registration to send an email to new users. In this application, the controller that handles the user registration is in the app/Http/Controllers/Auth/RegisteredUserController.php file. Open this file, and in the store method, add this code just before the return statement:
Mail::to($user->email)->send(new WelcomeMessage($user));
This code uses the Mail facade to send an email to the specified user using the WelcomeMessage mailable class.
Remember to add these use statements to the same file:
Test the app
Now it’s time to test if everything is working as expected. To do this, run the Laravel server using the following command:
Bash
php artisan serve
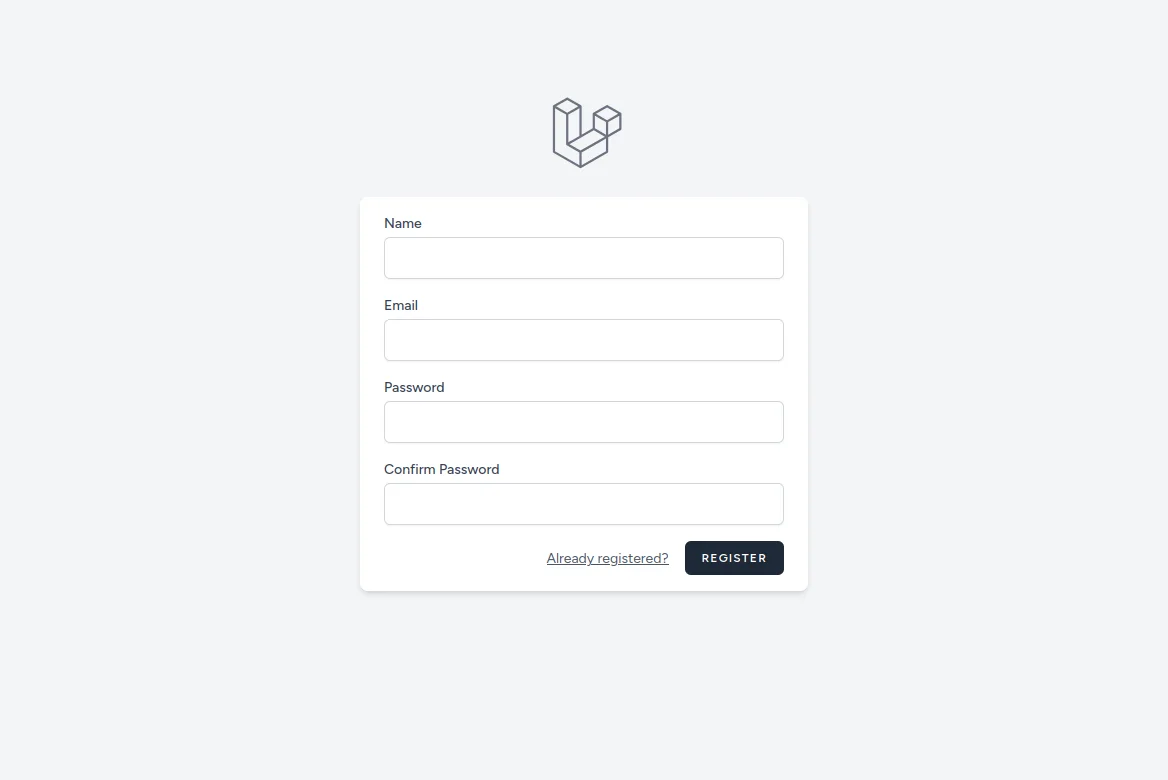
Navigate to http://localhost:8000/register in your browser, fill out all the details, and click the REGISTER button:
You should receive a welcome email in your inbox:
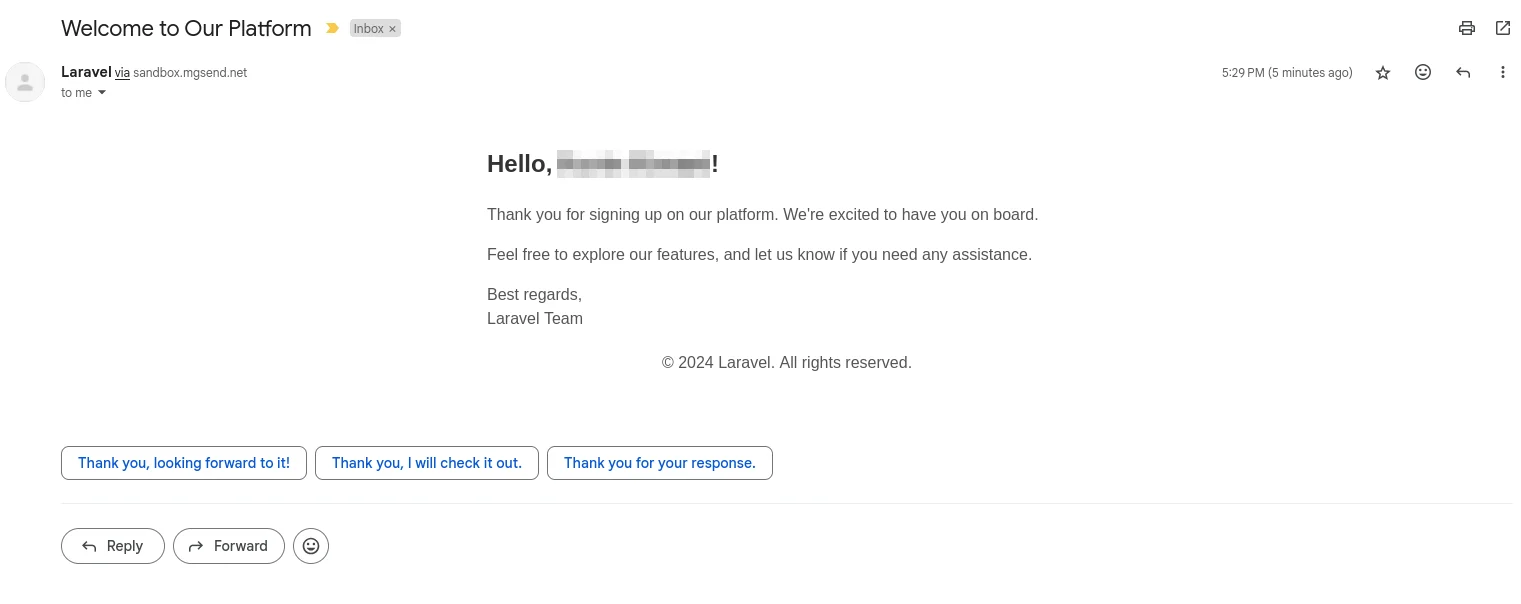
This confirms that everything is working as expected.
Advanced Mailgun features in Laravel
When integrating Mailgun with Laravel, you gain access to more advanced features that can enhance your email capabilities beyond just sending basic messages. Let’s take a look at some of these features.
Adding attachments to emails
Mailgun allows you to easily add attachments to your emails, which is a common requirement for sending invoices, reports, or other documents. You can add an attachment to emails using the attachments method in your mailable class:
public function attachments(): array rn{ rn return [ rn Attachment::fromPath('/path/to/file') rn ->as('fileName.pdf') rn ->withMime('application/pdf'), rn ]; rn}
You can also use inline attachments in your email templates:
HTML
<body> rn Sample image: rn <img src="{{ $message->embed($pathToImage) }}" /> rn</body>
Handling email tracking with Mailgun webhooks
Mailgun offers email tracking features that allow you to track important metrics, such as when users open your emails and click the attached links. This is useful for ensuring that your emails are reaching your users and being interacted with.
To implement tracking, you need to set up a Mailgun webhook and a dedicated route in your Laravel application that will receive webhook calls from Mailgun. You can then use the data received from the webhook to track the emails sent from your application.
Mailgun supports the use of tags that help you group emails for reporting and tracking purposes. You can add tags to your email through the envelope method in the mailable class:
public function envelope(): Envelope rn { rn return new Envelope( rn subject: 'Welcome to Our Platform', rn tags: ['welcome'], rn ); rn }
Error handling and debugging
When integrating Laravel with Mailgun, it’s important to handle errors and debug issues effectively to ensure reliability. Some of the common errors that you’ll encounter during the integration process include:
- Unauthorized: If the values MAILGUN_DOMAIN, MAILGUN_SECRET, and MAILGUN_ENDPOINT defined in your .env file are incorrect, Mailgun will not be able to authenticate your requests. You should double-check these values to make sure they’re correct.
- Domain not verified: In the production environment, if you try to send emails from a Mailgun domain that has not been verified, the request will fail. You need to verify your domain by adding the necessary DNS records (SPF and DKIM).
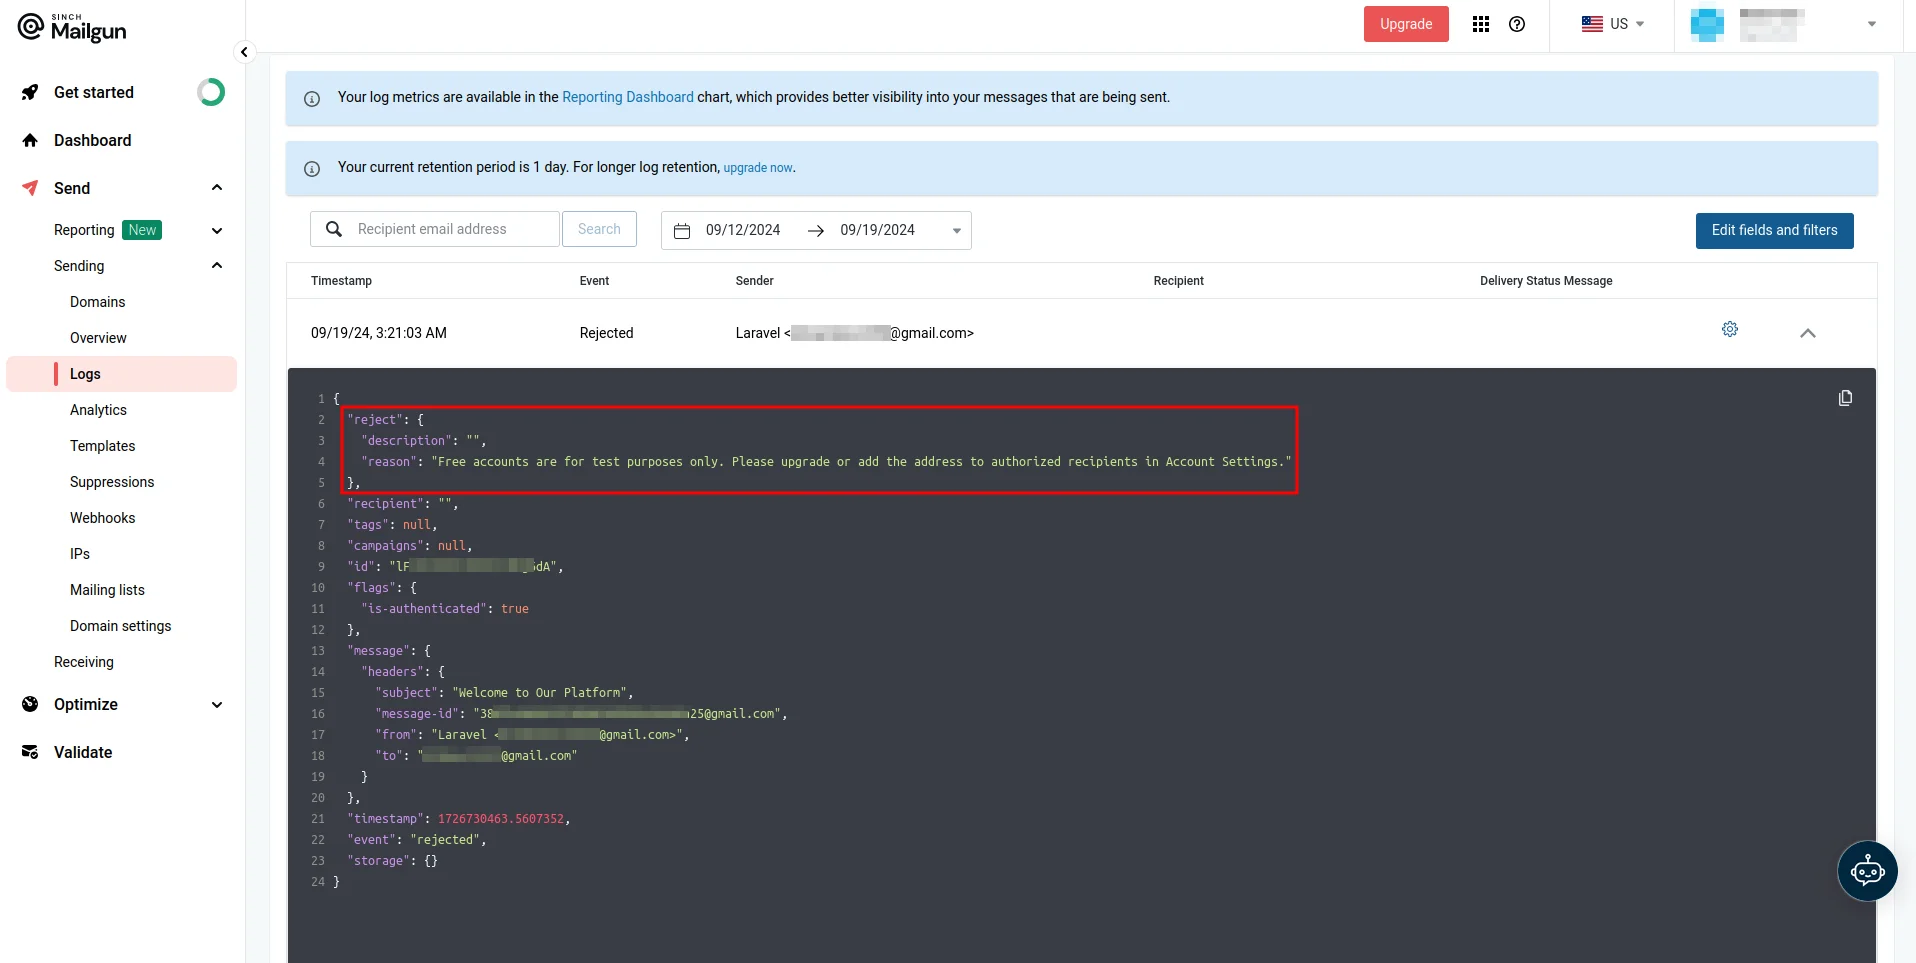
- Domain is not allowed to send: When using sandbox domains, you can only send emails to authorized recipients. You should make sure that your recipients are allowlisted when testing with a sandbox domain.
When an email occurs during the email-sending process, it’s typically recorded in the default Laravel log file located at storage/logs/laravel.log. If you want to manually log specific errors related to Mailgun, you should wrap the email-sending logic in a try…catch block to help you identify issues quickly:
Additionally, Mailgun provides an intuitive dashboard where you can monitor and troubleshoot email delivery issues. Some key features of the Mailgun dashboard include:
Email logs: Mailgun keeps detailed logs of all email activity, including successful deliveries, bounces, opens, clicks, and failures. You can filter and search through these logs to identify any failed deliveries or errors.
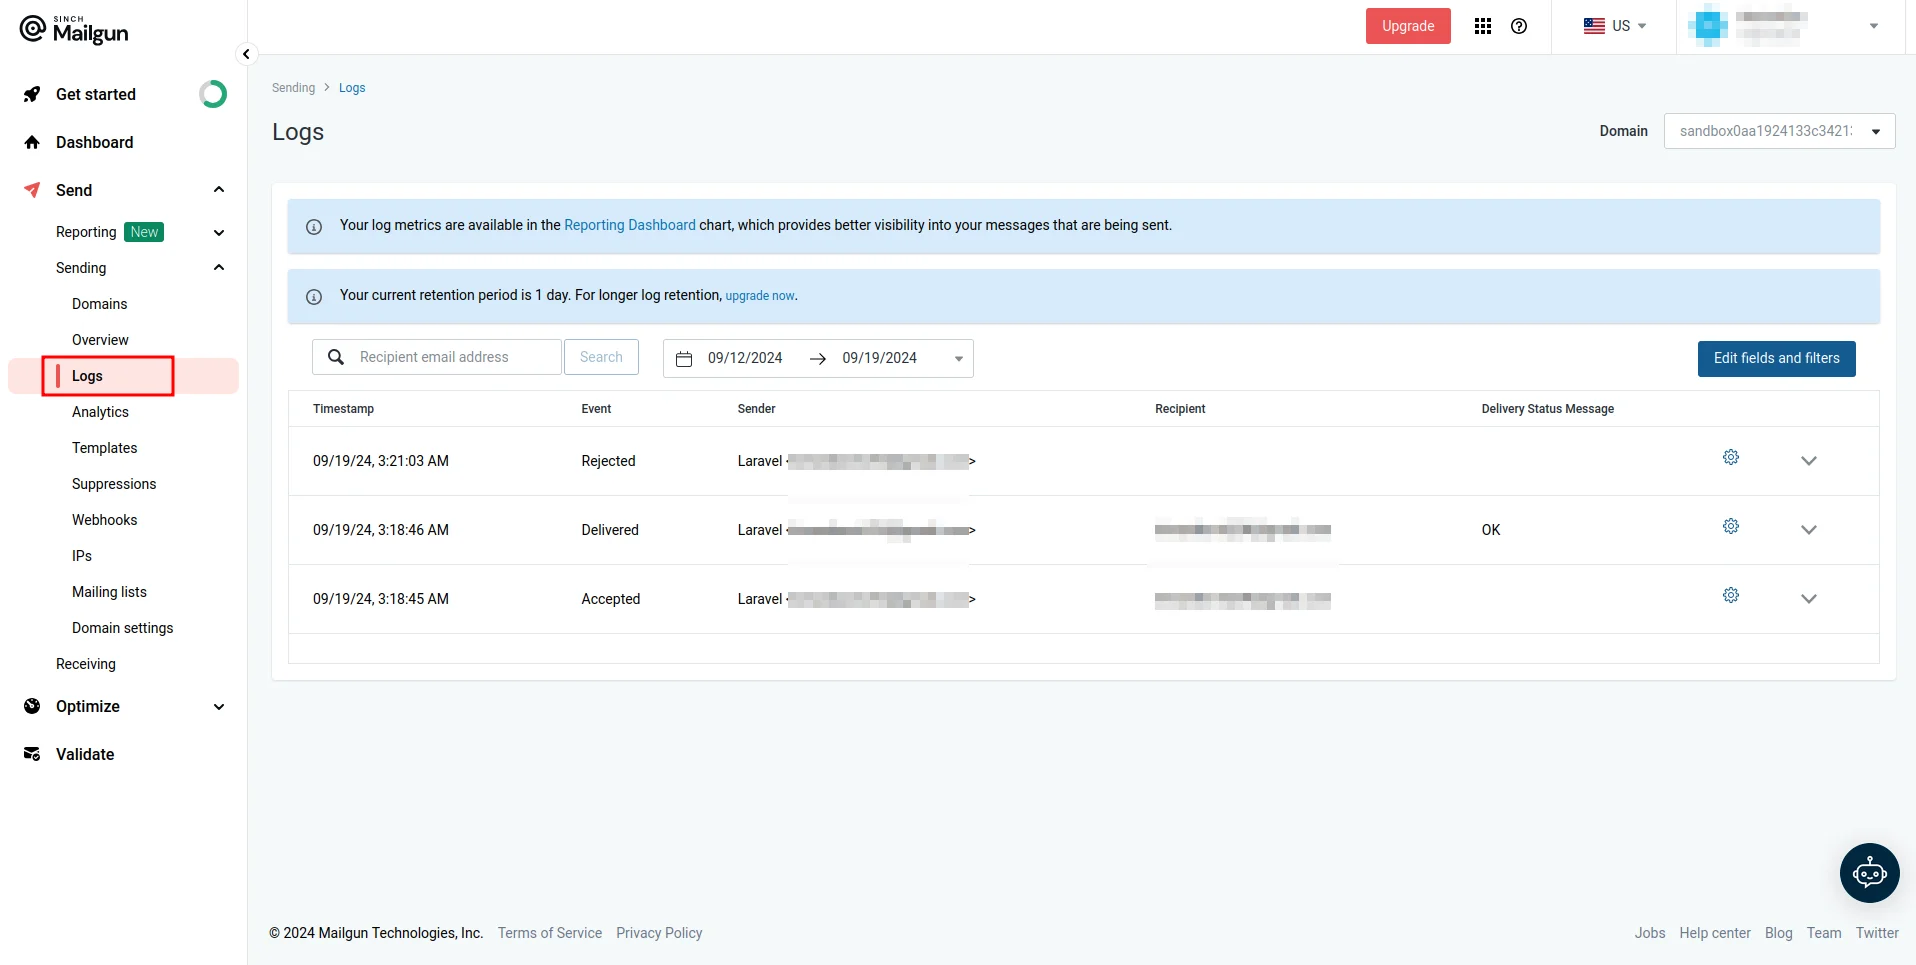
Error messages: For failed emails, Mailgun logs detailed error messages, which can help you understand why an email wasn’t delivered (such as invalid recipients or DNS issues).
You can access these logs and error messages on the Logs page, which you can access by navigating to Send > Sending > Logs on the Mailgun dashboard.
Troubleshooting and debugging
What are common Issues and solutions for sending email with Mailgun and Laravel?
1. Authentication errors
- Check your Mailgun credentials.
- Verify your endpoint matches your region.
2. Domain verification
- Ensure DNS records are properly configured.
- Verify SPF and DKIM settings.
3. Sandbox limitations
- Confirm recipient authorization.
- Check sending limits.
How should you be monitoring delivery?
Access detailed logs through your Mailgun dashboard:
- Navigate to Send > Sending > Logs.
- Review delivery status.
- Check bounce reports.
- Monitor engagement metric.
What are best practices for error handling?
Implement proper error handling:
Best practices To ensure optimal deliverability:
1. Separate your email types
- Use different domains for transactional and marketing emails.
- Implement proper queuing for bulk sends.
2. Monitor your metrics
- Track bounce rates.
- Monitor spam complaints.
- Analyze open rates.
3. Maintain list hygiene
- Regular cleanup of invalid addresses.
- Remove unengaged subscribers.
- Handle bounces appropriately.
What’s next?
You’ve mastered the basics of Laravel and Mailgun integration. Ready to level up? Explore:
- Setting up email templates
- Implementing dynamic content
- Advanced tracking features
- A/B testing capabilities
Ready to send emails with confidence? Sign up for a Mailgun account and start your sending.