How to send transactional email in a NodeJS app using the Mailgun API
Not only can you get powerful re-engagement based on triggers, actions, and patterns, you can also communicate important information automatically between your platform and a customer.
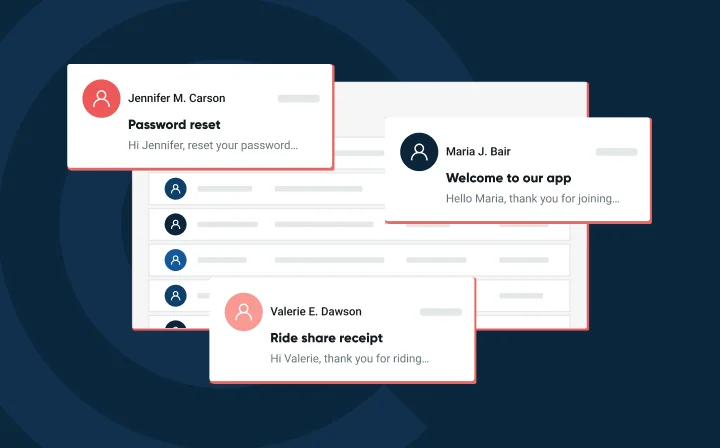
It’s highly likely that during your life as a developer you’ll have to send automated transactional emails, if you haven’t already, like:
- Confirmation emails
- Password reminders
…and many other kinds of notifications.
In this tutorial, we’re going to learn how to send transactional emails using the Mailgun API and using a NodeJS helper library.
We will cover different scenarios:
- Sending a single transactional email
- Sending a newsletter to an email list
- Adding email addresses to a list
- Sending an invoice to a single email address
Sending emails: SMTP vs API
When sending emails from a Node.js app, you can use a direct SMTP client or an email API. Traditionally, developers would use a library like Nodemailer to configure a direct connection to an SMTP server. While SMTP gives you control, it comes with several drawbacks, like complex configuration and poor deliverability.
The API approach, like the one used by Mailgun, simplifies the entire process. Instead of managing the underlying protocol, you make a simple HTTP request. Mailgun’s robust infrastructure handles the SMTP communication for you, providing better deliverability and built-in features like analytics and email validation.
Getting started with your Node.js app
This section will guide you through setting up your project and getting your app running.
Step 1: Project initialization
We will assume you have installed and know how to operate within the NodeJS environment.
The first thing we’re going to do is generate a package.json file in a new directory (/mailgun_nodetut, in my case). This file contains details such as the project name and required dependencies.
                                {
  "name": "mailgun-node-tutorial",
  "version": "0.0.1",
  "private": true,
  "scripts": {
    "start": "node app.js"
  },
  "dependencies": {
    "express": "4",
    "jade": "*",
    "mailgun-js": "0.5"
  }
}
As you can see, we’re going to use expressjs for our web-app scaffolding, with jade as a templating language, and finally, a community-contributed library for Node by bojand.
In the same folder where you’ve created the package.json file, create two additional folders: views/ js/
You’re all set – just sign in to Mailgun (it’s free if you haven’t already), and get your API key from the first page in the control panel.
Step 2: Set up a simple ExpressJS app
Save the code below as app.js in the root directory of your app (where package.json is located)
                                //We're using the express framework and the mailgun-js wrapper
var express = require('express');
var Mailgun = require('mailgun-js');
//init express
var app = express();

//Your api key, from Mailgun’s Control Panel
var api_key = 'MAILGUN-API-KEY';

//Your domain, from the Mailgun Control Panel
var domain = 'YOUR-DOMAIN.com';

//Your sending email address
var from_who = 'your@email.com';

//Tell express to fetch files from the /js directory
app.use(express.static(__dirname + '/js'));
//We're using the Jade templating language because it's fast and neat
app.set('view engine', 'jade')

//Do something when you're landing on the first page
app.get('/', function(req, res) {
//render the index.jade file - input forms for humans
res.render('index', function(err, html) {
if (err) {
// log any error to the console for debug
console.log(err);
}
else {
//no error, so send the html to the browser
res.send(html)
};
});
});

// Send a message to the specified email address when you navigate to /submit/someaddr@email.com
// The index redirects here
app.get('/submit/:mail', function(req,res) {

//We pass the api_key and domain to the wrapper, or it won't be able to identify + send emails
var mailgun = new Mailgun({apiKey: api_key, domain: domain});

var data = {
//Specify email data
from: from_who,
//The email to contact
to: req.params.mail,
//Subject and text data
subject: 'Hello from Mailgun',
html: 'Hello, This is not a plain-text email, I wanted to test some spicy Mailgun sauce in NodeJS! <a href="http://0.0.0.0:3030/validate?' + req.params.mail + '">Click here to add your email address to a mailing list</a>'
}

//Invokes the method to send emails given the above data with the helper library
mailgun.messages().send(data, function (err, body) {
//If there is an error, render the error page
if (err) {
res.render('error', { error : err});
console.log("got an error: ", err);
}
//Else we can greet    and leave
else {
//Here "submitted.jade" is the view file for this landing page
//We pass the variable "email" from the url parameter in an object rendered by Jade
res.render('submitted', { email : req.params.mail });
console.log(body);
}
});

});

app.get('/validate/:mail', function(req,res) {
var mailgun = new Mailgun({apiKey: api_key, domain: domain});

var members = [
{
address: req.params.mail
}
];
//For the sake of this tutorial you need to create a mailing list on Mailgun.com/cp/lists and put its address below
mailgun.lists('NAME@MAILINGLIST.COM').members().add({ members: members, subscribed: true }, function (err, body) {
console.log(body);
if (err) {
res.send("Error - check console");
}
else {
res.send("Added to mailing list");
}
});

})

app.get('/invoice/:mail', function(req,res){
//Which file to send? I made an empty invoice.txt file in the root directory
//We required the path module here..to find the full path to attach the file!
var path = require("path");
var fp = path.join(__dirname, 'invoice.txt');
//Settings
var mailgun = new Mailgun({apiKey: api_key, domain: domain});

var data = {
from: from_who,
to: req.params.mail,
subject: 'An invoice from your friendly hackers',
text: 'A fake invoice should be attached, it is just an empty text file after all',
attachment: fp
};

//Sending the email with attachment109    mailgun.messages().send(data, function (error, body) {
if (error) {
res.render('error', {error: error});
}
else {
res.send("Attachment is on its way");
console.log("attachment sent", fp);
}
});
})

app.listen(3030);
Step 3: Create the view and JavaScript files:
Save the code below as index.jade within the /views directory
                                doctype html
html
head
title Mailgun Transactional demo in NodeJS
body
p Welcome to a Mailgun form
form(id="mgform")
label(for="mail") Email
input(type="text" id="mail" placeholder="Youremail@address.com")
button(value="bulk" onclick="mgform.hid=this.value") Send transactional
button(value="list" onclick="mgform.hid=this.value") Add to list
button(value="inv" onclick="mgform.hid=this.value") Send invoice
script(type="text/javascript" src="main.js")
Save the code below as error.jade within the /views directory
                                doctype html
html
head
title Mailgun Transactional
body
p Well that's awkward: #{error}
Save the code below as main.js within the /js directory
                                var vForm = document.getElementById('mgform');
var vInput = document.getElementById('mail');

vForm.onsubmit = function() {
if (this.hid == "bulk") {
location = "/submit/" + encodeURIComponent(vInput.value);
}
if (this.hid == "list") {
location = "/validate/" + encodeURIComponent(vInput.value);
}
if (this.hid == "inv") {
location = "/invoice/" + encodeURIComponent(vInput.value);
}

return false;
}
Finally, create an empty invoice.txt file in your root folder. This file will be sent as an attachment.
Step 4: Run the application
- Run
npm install(orsudo npm installin some cases, depending on your installation methods) to download dependencies, including Express.
- Once that’s done, run
node app.js
- Navigate with your browser to
localhost:3030(or0.0.0.0:3030)
These three easy steps are how you get started sending transactional email on demand!
Understanding how the app works
This above is a simple express app that will run on your local machine on port 3030. We have defined it to use expressjs and the mailgun-js wrapper. These are pretty well-known libraries that will help us quickly set up a small website that will allow users to trigger the sending of email addresses to their address.
The endpoints
We’ve defined 4 endpoints.
//submit/:mail/validate/:mail/invoice/:mail
Where :mail is your valid email address.
When navigating to an endpoint, Express will send to the browser a different view.
In the background, Express will take the input provided by the browser and process it with the help of the mailgun-js library.
In the first case, we will navigate to the root that is localhost:3030/
You can see there’s an input box requesting your email address. By doing this, you send yourself a nice transactional email.
This is because expressjs takes your email address from the URL parameter and by using your API key and domain does an API call to the endpoint to send emails.
Each endpoint will invoke a different layout, I’ve added the code of basic layouts below, feel free to add and remove stuff from it.
Practical examples: Sending emails with the Mailgun Node.js API
In our example, we’ve seen how you can send a transactional email automatically when the user triggers a specific action.
Sending a single transactional email
When you navigate to the root localhost:3030/, you’ll see an input box requesting your email address. By doing this, you send yourself a nice transactional email.
Adding email addresses to a list
The /validate/:mail endpoint shows how to add an email address to a mailing list. For the sake of this tutorial, you need to create a mailing list on Mailgun.com/cp/lists and put its address in the app.js code.
Sending an invoice with an attachment
The /invoice/:mail endpoint shows how to send an attachment. We have required the path module to find the full path to attach the empty invoice.txt file in your root directory.
Finalizing your Node.js email sender
In our example, we’ve seen how you can send a transactional email automatically when the user triggers a specific action, in our specific case, submitting the form.
There are thousands of applications that you could adapt this scenario to. Sending emails can be used for:
- Registering an account on a site and Hello message email
- Resetting a password
- Confirming purchases or critical actions (deleting an account)
- Two-factor authentication with multiple email addresses
What do you use transactional emails for in your day-to-day business?
