Product
Quick tips to getting started with Mailgun
We’ve all been where you’re sitting right now. You’ve just finished signing up for Mailgun, the activation email is on its way to your inbox, and you’re poring over our documentation to get a better understanding of how to build the perfect scripts for sending.
As exciting as this time may be, it’s important to take your time and get the basics done right so you can get up and running safely. When you put together all of the proper building blocks for stronger sending at the start, you’re less likely to run into issues down the road. As a member of Mailgun’s support team, I see a lot of what holds senders up down the line. So, to get you off on the right track, here are some of our popular documentation and support requests:
Verifying your domain with Mailgun’s DNS records
A verified domain is required to send any emails at Mailgun, and the verification process is critical to protecting our infrastructure and your domain’s sending reputation. Why? If we didn’t require users to verify their domain, bad actors could claim they were PayPal or Google or even YOUR company to send emails that could contain malicious code, inappropriate content, or any other nightmare situation.
We want to ensure that users are sending from a domain that they control to mitigate these risks. The best way to do that is to have our customers add domain specific domains to their DNS host file/zone file. This process can take up to 24-48 hours to complete, depending on your DNS host, which is why it’s best to start here.
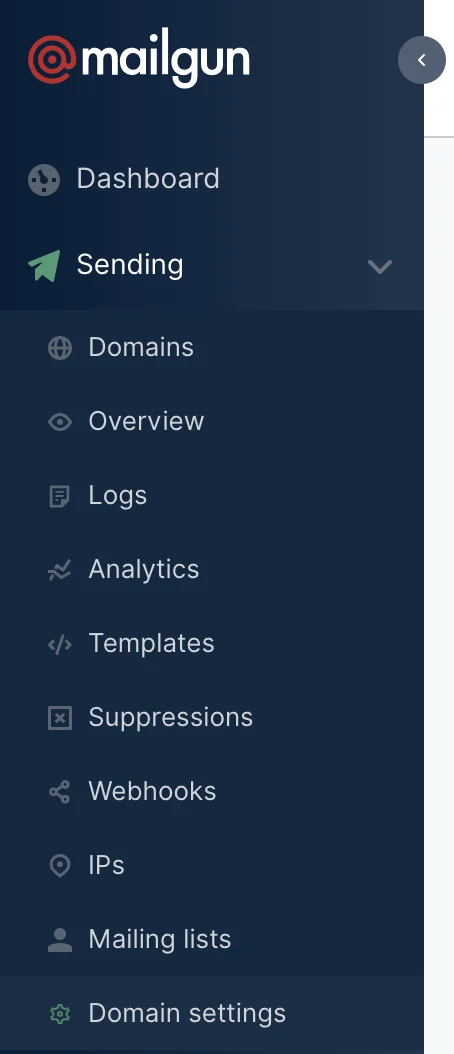
You can find your DNS records for each domain in your control panel by expanding the “Sending” menu in the Toolbar on the left hand side and clicking the “Domain Settings” button. This screen will show a drop down menu at the top of the screen containing all of the domains you have added to your account.
Select the domain you need the records for then click the “DNS Records” tab. Bring those records to your DNS host and have them input according to their specifications. Each DNS provider will have different formatting needs for each record, so it’s best to work with them to get this published correctly. Once these records have propagated, you will see green check marks next to the records in the “Domain Settings” page!
Requesting a Dedicated IP
Not all senders send enough emails to warrant the use of a dedicated IP, but some do. If you are in need of a dedicated IP, all you have to do is send in a request. To do so, start by expanding the sending menu on the left hand side of your control panel. From here, navigate to the IP section indicated below and click “Request Dedicated IP.” Doing so will generate a ticket for your account for our support team.
It’s important to note here that our support team may have to ask some additional questions about your sending to determine if a dedicated IP is the right fit for your sending. Once you pass the verification, they will assign the IP for your use.
Subscription dedicated IPs
While it might be included in your subscription, you will still have to request the IP in the same fashion outlined above. When you click the green button requesting the IP, you will still see a pop-up confirming that you wish to purchase an IP. Don’t worry, you aren’t getting charged if it is included in your subscription. Simply disregard that warning and press accept, the Dedicated IP credit for your subscription will be used to open up the ticket request.
Secure your account with 2FA
Hackers suck, and the best way to keep them out of your account is to enable 2FA for ALL admins and users on your account.
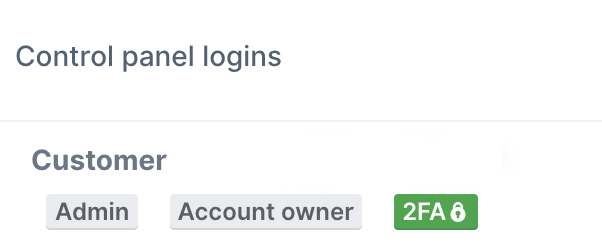
2FA will require a mobile app like Authy or Google Authenticator to complete, but if you are already using a 2FA app, all you need to do is expand the “Settings” menu from the Toolbar on the left hand side of the Mailgun Control Panel and select “Security and Users”. Then, click the green button that says “Activate 2FA” and follow the on screen instructions.
The first page will have you either scan the QR code with your Authenticator App or use the manual entry (Write down your paper key, you only get to see it once!) Then, once you have completed that step, enter the 6 digit code your authenticator app generates for you on the next screen and voila, your login is as secure as Fort Knox.
Setting Account sending/validation limits
Speaking of protecting your wallet and reputation, setting limits is another fantastic way to safeguard your account in case someone does manage to get your SMTP/API creds. You can set a monthly account-wide limit for each of these services. When this limit is reached, the account is disabled. This allows you to check your applications and determine where the breach occurred to make necessary changes without all the added stress of billing concerns.
You can set these values by expanding the “Settings” menu from the left hand side of your control panel and clicking “Details”. In the “Account Settings” section, you will see a field for “Custom Message Limit” and “Public Validation Limit.” Custom message limits are exactly that, a limit on how many messages can come from a single account. Public validation limit acts in a similar fashion, but limits how email addresses can be validated from your public API key.
Adding unsubscribes
Did you know that Mailgun can automatically add an unsubscribe link to your emails without any additional coding? Unsubscribes are essential for good list maintenance and discourage users from marking you as spam instead of unsubscribing.
All you have to do is expand the “Sending” menu from the left hand side of the Mailgun control panel and select “Domain Details.” Using the drop down menu at the top of the screen, select the domain that needs an unsubscribe link. Once you have selected the domain, scroll down to tracking and turn unsubscribes on.
Wrapping up
At the start, we see a lot of new users not follow these tips and end up setting themselves up for failure. Luckily, you should be able to avoid these pitfalls and get started on your way to faster, easier sending.
One last bonus tip: If you ever need assistance with the API, have questions about our control panel, or need information about our services – just submit a ticket! You can open a ticket with support by clicking the “Support” button in the Toolbar on the left hand side of the Mailgun control panel and we will be happy to help.