Product
Create a web app from scratch in under 5 minutes with Meteor & Mailgun
This post was written by Vianney Lecroart, a Meteor earlyvangelist and captain of the Meteor Group in Paris/France. Vianney wrote his first program when he was 6. After 8 years working in a massively multiplayer online game startup, he decided to join the other side of the Force by becoming a full time entrepreneur. His startup? If you like Asana or Trello, you’ll like his project. Follow him at @acemtp to stay tuned!
A couple weeks ago Meteor announced integration with Mailgun, which allows any Meteor app to send email effortlessly. Today I’m going to go through an example that shows how quickly you can get a sample app up and running.
For those that missed the last post, Meteor is an open-source platform for building top-quality web apps in a fraction of the time, whether you’re an expert developer or just getting started. Meteor also comes with a built integration with Mailgun for sending emails without any configuration whatsoever when you deploy your app on the Meteor platform. This combination makes creating email enabled web apps extremely fast and simple.
Ready, set, code
For this example, I’ll use a fairly common use case for a registration webpage – your user needs the ability to register to receive additional information about a product and receive a confirmation email. Let’s see how fast you can get this live using Meteor and Mailgun.
The base requirements are that a registrant must be able to fill out a form with their email address, and click a button to receive a confirmation email. To make it interesting, let’s add that the webpage must be live on Internet, not on your local computer and you are only authorized to use a computer that has nothing installed on it except for the default Mac (or linux) installation.
Start the clock. Let’s go Meteor!
Install Meteor (1 minute with slow bandwidth)
Since we have nothing on the computer, we need to install meteor:
$ curl https://install.meteor.com | sh
Create the project (2 seconds)
Now create the meteor project and start working on it:
$ meteor create meteoremailrn$ cd meteoremail
Since we need to be able to send emails, we need to install the email smart package too:
$ meteor add email
This package is automatically configured to send emails (up to 300 per day) through Mailgun without any coding whatsoever, you don’t even need to supply credentials. If you need to send more than 300 emails per day, see the optional step below.
Fill meteoremail.html (1 minute if you type slowly)
By default, meteor creates the html file for us with a basic template that displays a button and a text so we first replace this default text with this one:
<body>rn {{> email}}rn</body>rnrn<template name="email">rn {{#if done}}rn <p>Email sent! Thank you for your interest in us.</p>rn {{else}}rn <label for="email">rn Enter your email address to receive news about usrn </label><br/>rn <input type="text" id="email" size="45" />rn <input type="button" id="btn" value="Submit" />rn {{/if}}rn</template>rn
The body only contains the call to insert the template named email. And the template is just an input text box with a label and an input button. The reason why we create a template instead of putting the directly in the body is that event catching is made on templates.
Fill the meteoremail.js (2 minutes)
The meteoremail.js contains all the client and server code. It’s the most complex part of this tutorial! I’ve added comments in the code so you can see exactly what the code is doing.
if (Meteor.isClient) {rn // On the client, track the DOM click event on the input.rn Template.email.events({rn 'click #btn': function () {rn // When someone clicks the button, call the server method `sendEmail`rn Meteor.call('sendEmail', $('#email').val());rn Session.set('done', true);rn }rn });rnrn Template.email.done = function () {rn return Session.equals('done', true);rn };rn}rnrnif (Meteor.isServer) {rn // On the server, define the sendEmail RPC functionrn Meteor.methods({rn sendEmail: function (email) {rn // Send the emailrn Email.send({rn to: email,rn from: 'acemtp@gmail.com',rn subject: 'Thank you for signing up for our project',rn text: 'We will share with you some news about us in a near future. See you soon!'rn });rn }rn });rn}rn
That’s all for the code.
Try the project locally (10 seconds)
To test locally, just type:
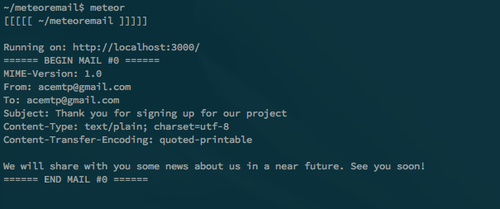
$ meteor
Open your browser to http://localhost:3000. You should see the button. Now click on it to display the email to the server output terminal.
Put the project on Internet (8 seconds)
With most web applications, additional hurdles usually start now: get a server, pack the project, upload it to the server, install and configure apache/rails/php/whatever you use, install and configure a SMTP daemon, and so on…
But don’t worry, you’re using Meteor!
Type:
$ meteor deploy meteoremail
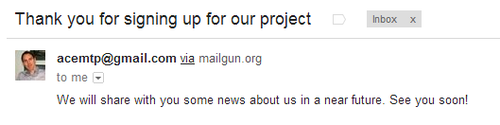
Then, open a browser to http://meteoremail.meteor.com… It’s alive, it’s alive… it’s ALIVE!

Click on the button and the email is sent and a confirmation is displayed for the user!
How is it possible? Because Meteor takes care of everything. When you use meteor deploy, Meteor creates the subdomain meteoremail.meteor.com, configures the server, bundles and uploads the project and push it live.
When we added the Meteor email package, Meteor’s partnership with Mailgun allowed it to create and link a Mailgun account automatically. Without setting up anything, you can send up to 300 emails per day … for FREE!
Conclusion?
In less than 5 minutes (the longest part was due to you, slow fingers!), we were able to create AND deploy a simple registration form! How? By being a smart developer who choses the best framework, and of course thanks to Meteor and Mailgun
Extra optional step
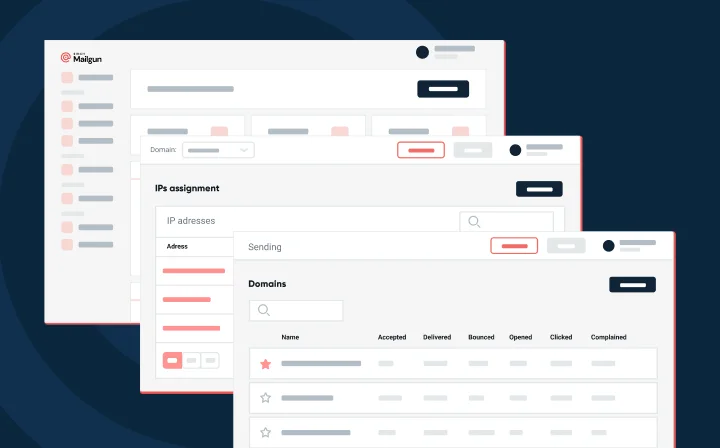
Now, let’s say interest in your product is really taking off and 300 email per day is not cutting it. You’d also like to have more access to tracking email stats and the ability to handle and parse incoming emails. You can easily create a Mailgun account and link it to your Meteor application.
After creating your account on Mailgun, get your password in the admin interface, under the Domain tab. Then, add the following code to the server part of your Meteor project (don’t forget to change YOURDOMAIN and YOURPASSWORD):
Meteor.startup(function () {rn process.env.MAIL_URL = 'smtp://postmaster%40YOURDOMAIN.mailgun.org:YOURPASSWORD@smtp.mailgun.org:587';rn});rn
You’re done! Just deploy it again and now it’ll use your Mailgun account to send as many emails as needed.
You can access a more detailed tutorial on my blog.
Let us know what you think in the comments below or join the discussion over at HackerNews!